This is a local example. You will run and explore results using the open-source Python library. At the end, we’ll optionally show how to upload results to the Evidently Platform for easy exploration.
- Reference-based. Compare new responses against a reference. This is useful for regression testing or whenever you have a “ground truth” (approved responses) to compare against.
- Open-ended. Evaluate responses based on custom criteria, which helps evaluate new outputs when there’s no reference available.
Prefer videos? We also have an extended code tutorial where we iteratively improve the prompt for LLM judge with a video walkthrough: https://www.youtube.com/watch?v=kP_aaFnXLmY
Tutorial scope
Here’s what we’ll do:- Create an evaluation dataset. Create a toy Q&A dataset.
- Create and run an LLM as a judge. Design an LLM evaluator prompt.
- Evaluate the judge. Compare the LLM judge’s evaluations with manual labels.
- Basic Python knowledge.
- An OpenAI API key to use for the LLM evaluator.
Run a sample notebook: Jupyter notebook or open it in Colab.
1. Installation and Imports
Install Evidently:Using other evaluator LLMs. Check the LLM judge docs to see how you can select a different evaluator LLM.
2. Create the Dataset
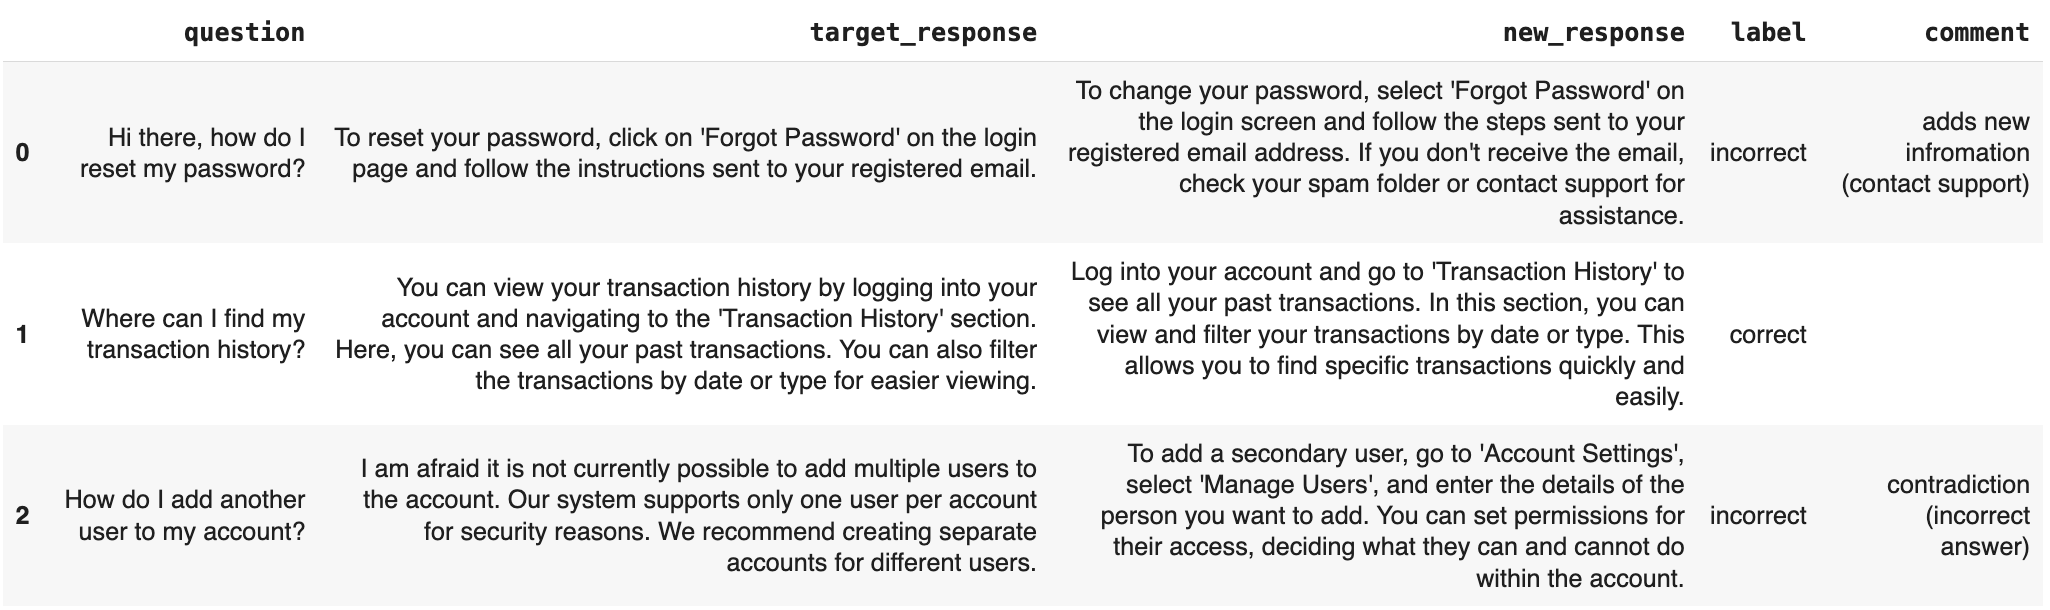
First, we’ll create a toy Q&A dataset with customer support question that includes:- Questions. The inputs sent to the LLM app.
- Target responses. The approved responses you consider accurate.
- New responses. Imitated new responses from the system.
- Manual labels with explanation. Labels that say if response is correct or not.
- Formulate better criteria. You discover nuances that help you write a better prompt.
- Get the “ground truth”. You can use it to evaluate the quality of the LLM judge.
Toy data to run the example
Toy data to run the example
Synthetic data. You can also generate example inputs for your LLM app using Evidently Platform.
How to preview
How to preview
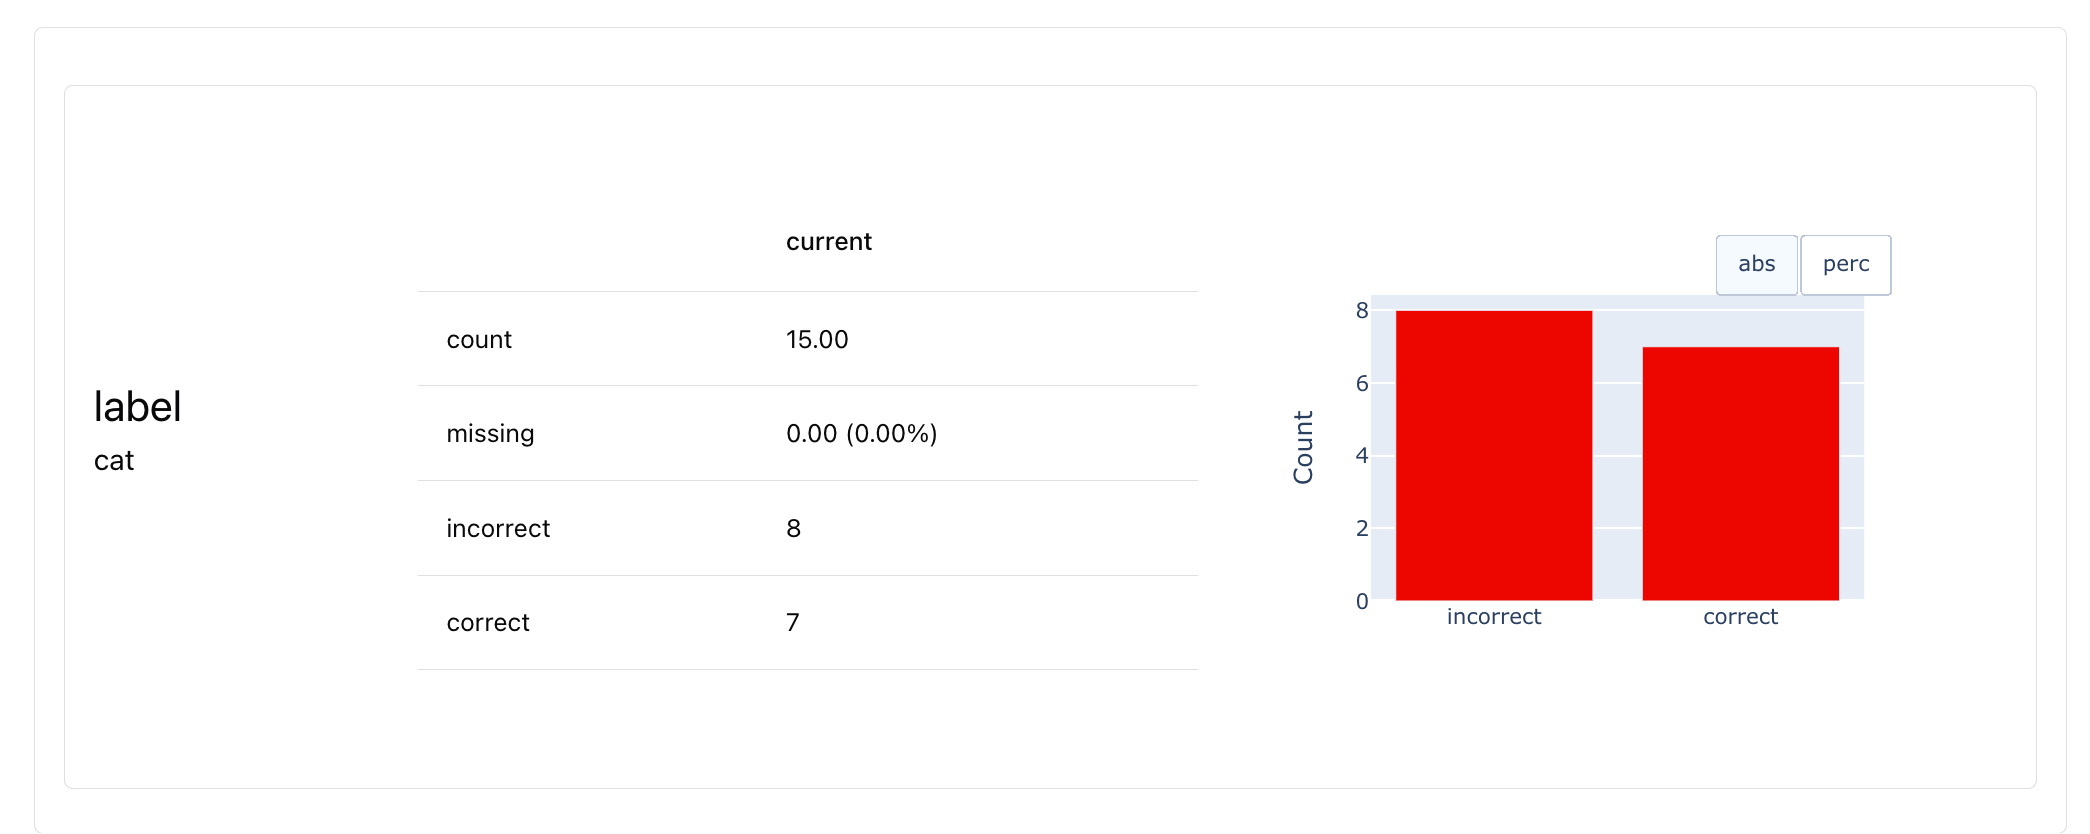
Run this to preview the distribution of the column.
3. Correctness evaluator
Now it’s time to set up an LLM judge! We’ll start with an evaluator that checks if responses are correct compared to the reference. The goal is to match the quality of our manual labels. Configure the evaluator prompt. We’ll use the LLMEval Descriptor to create a custom binary evaluator. Here’s how to define the prompt template for correctness:The Binary Classification template (check docs) instructs an LLM to classify the input into two classes and add reasoning. You don’t need to ask for these details explicitly, or worry about parsing the output structure — that’s built into the template. You only need to add the criteria. You can also use a multi-class template.
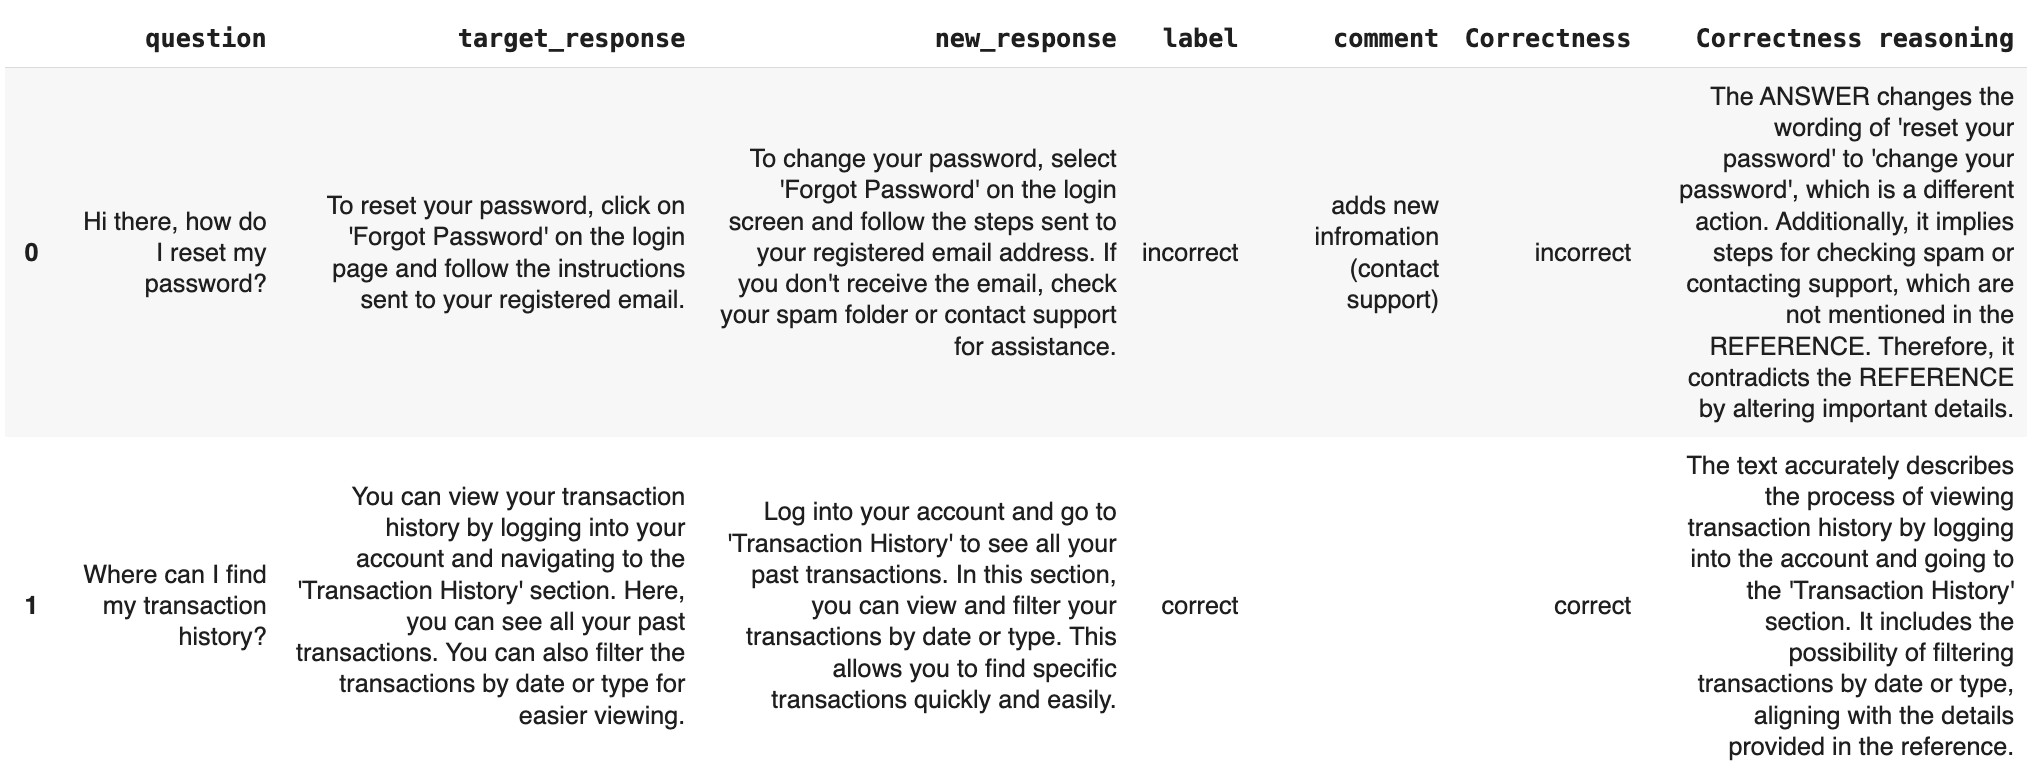
Note: your explanations will vary since LLMs are non-deterministic.
as_dict() for a Python dictionary output.
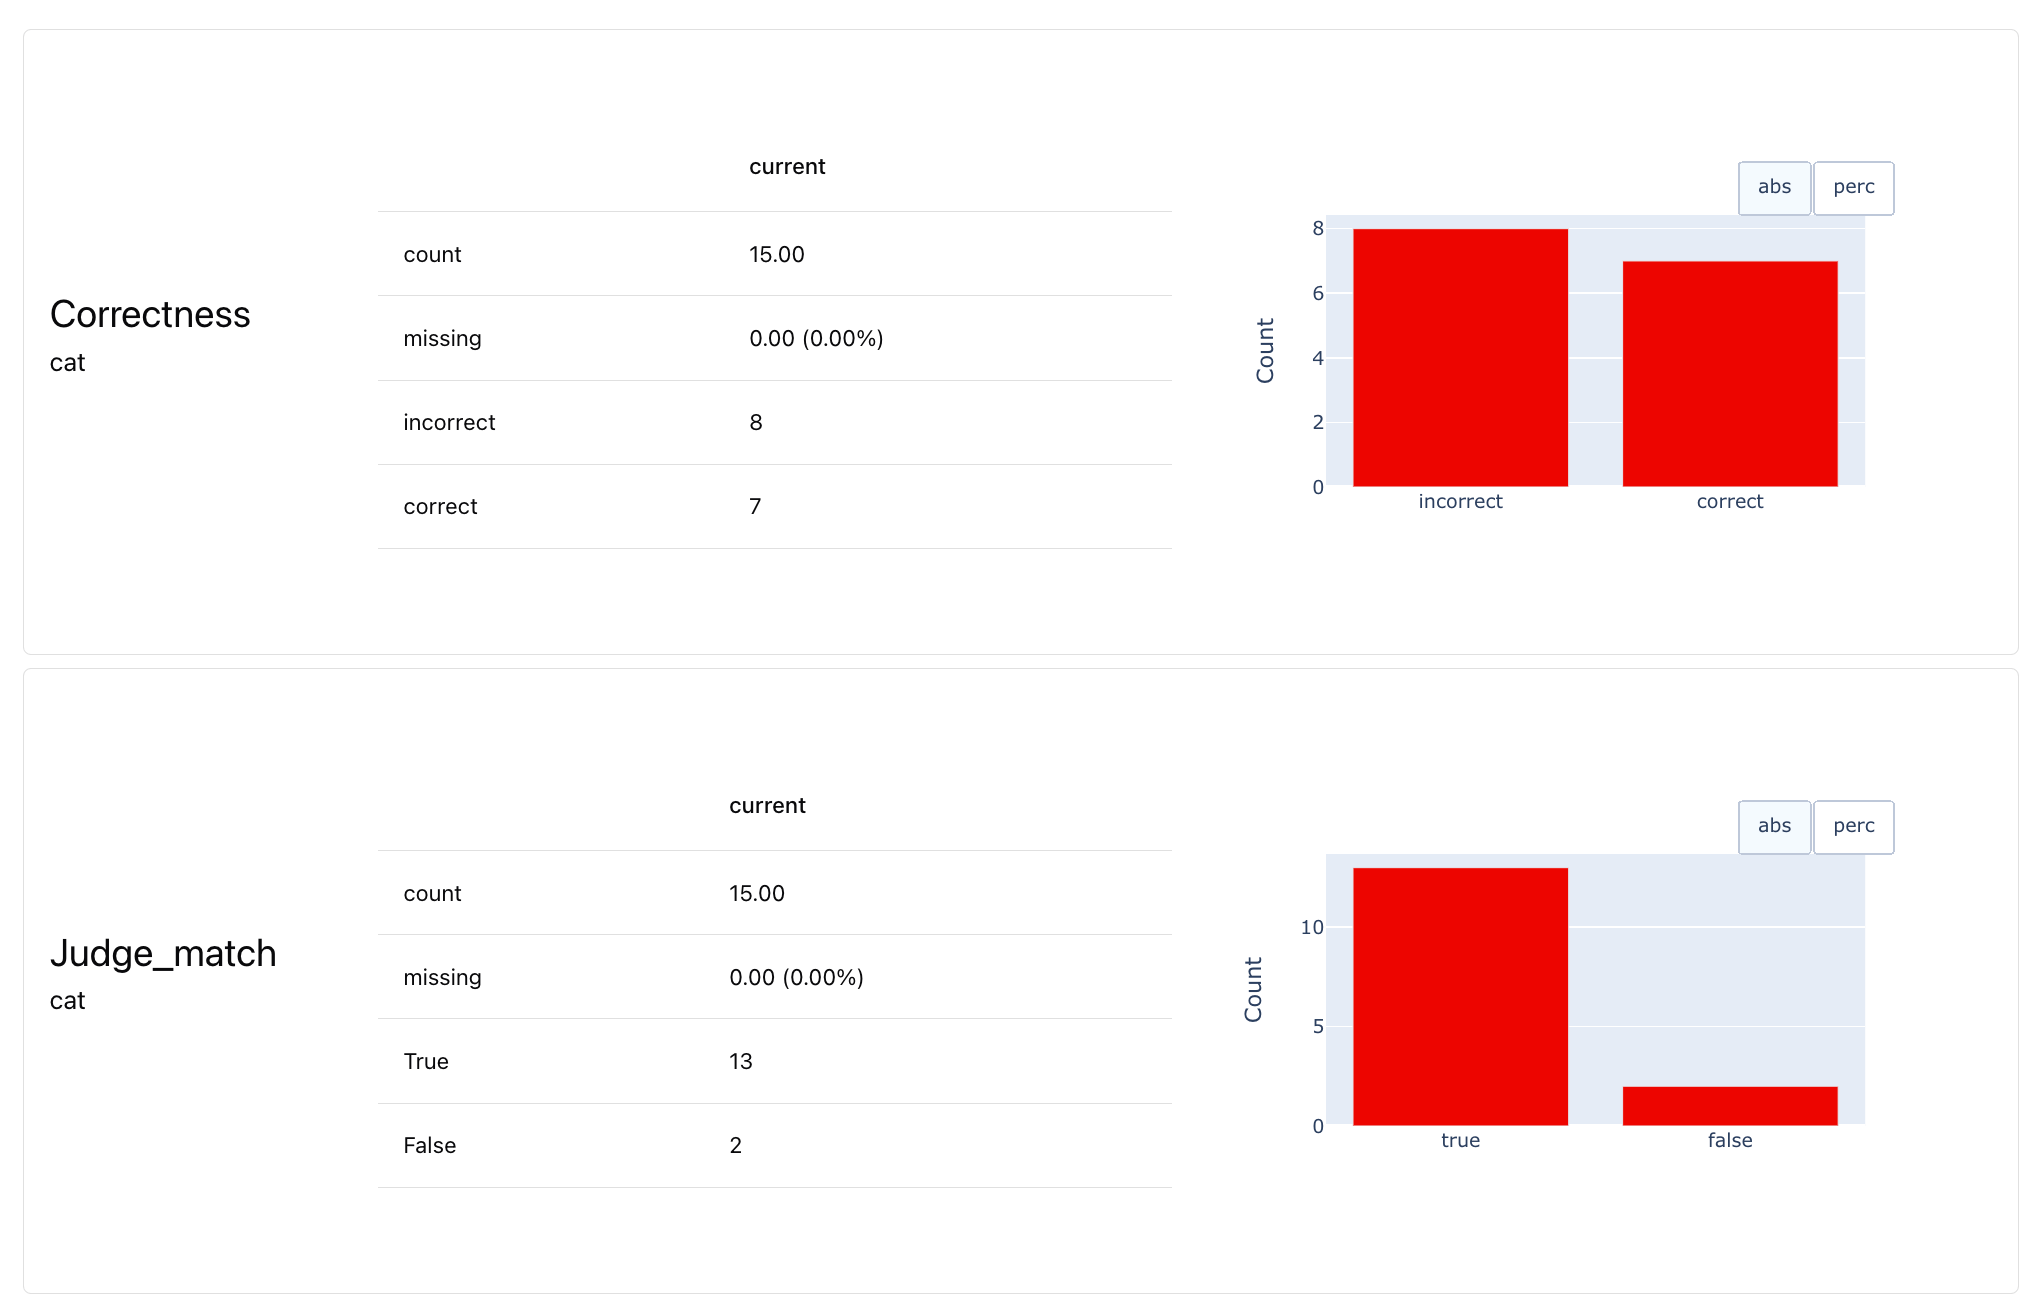
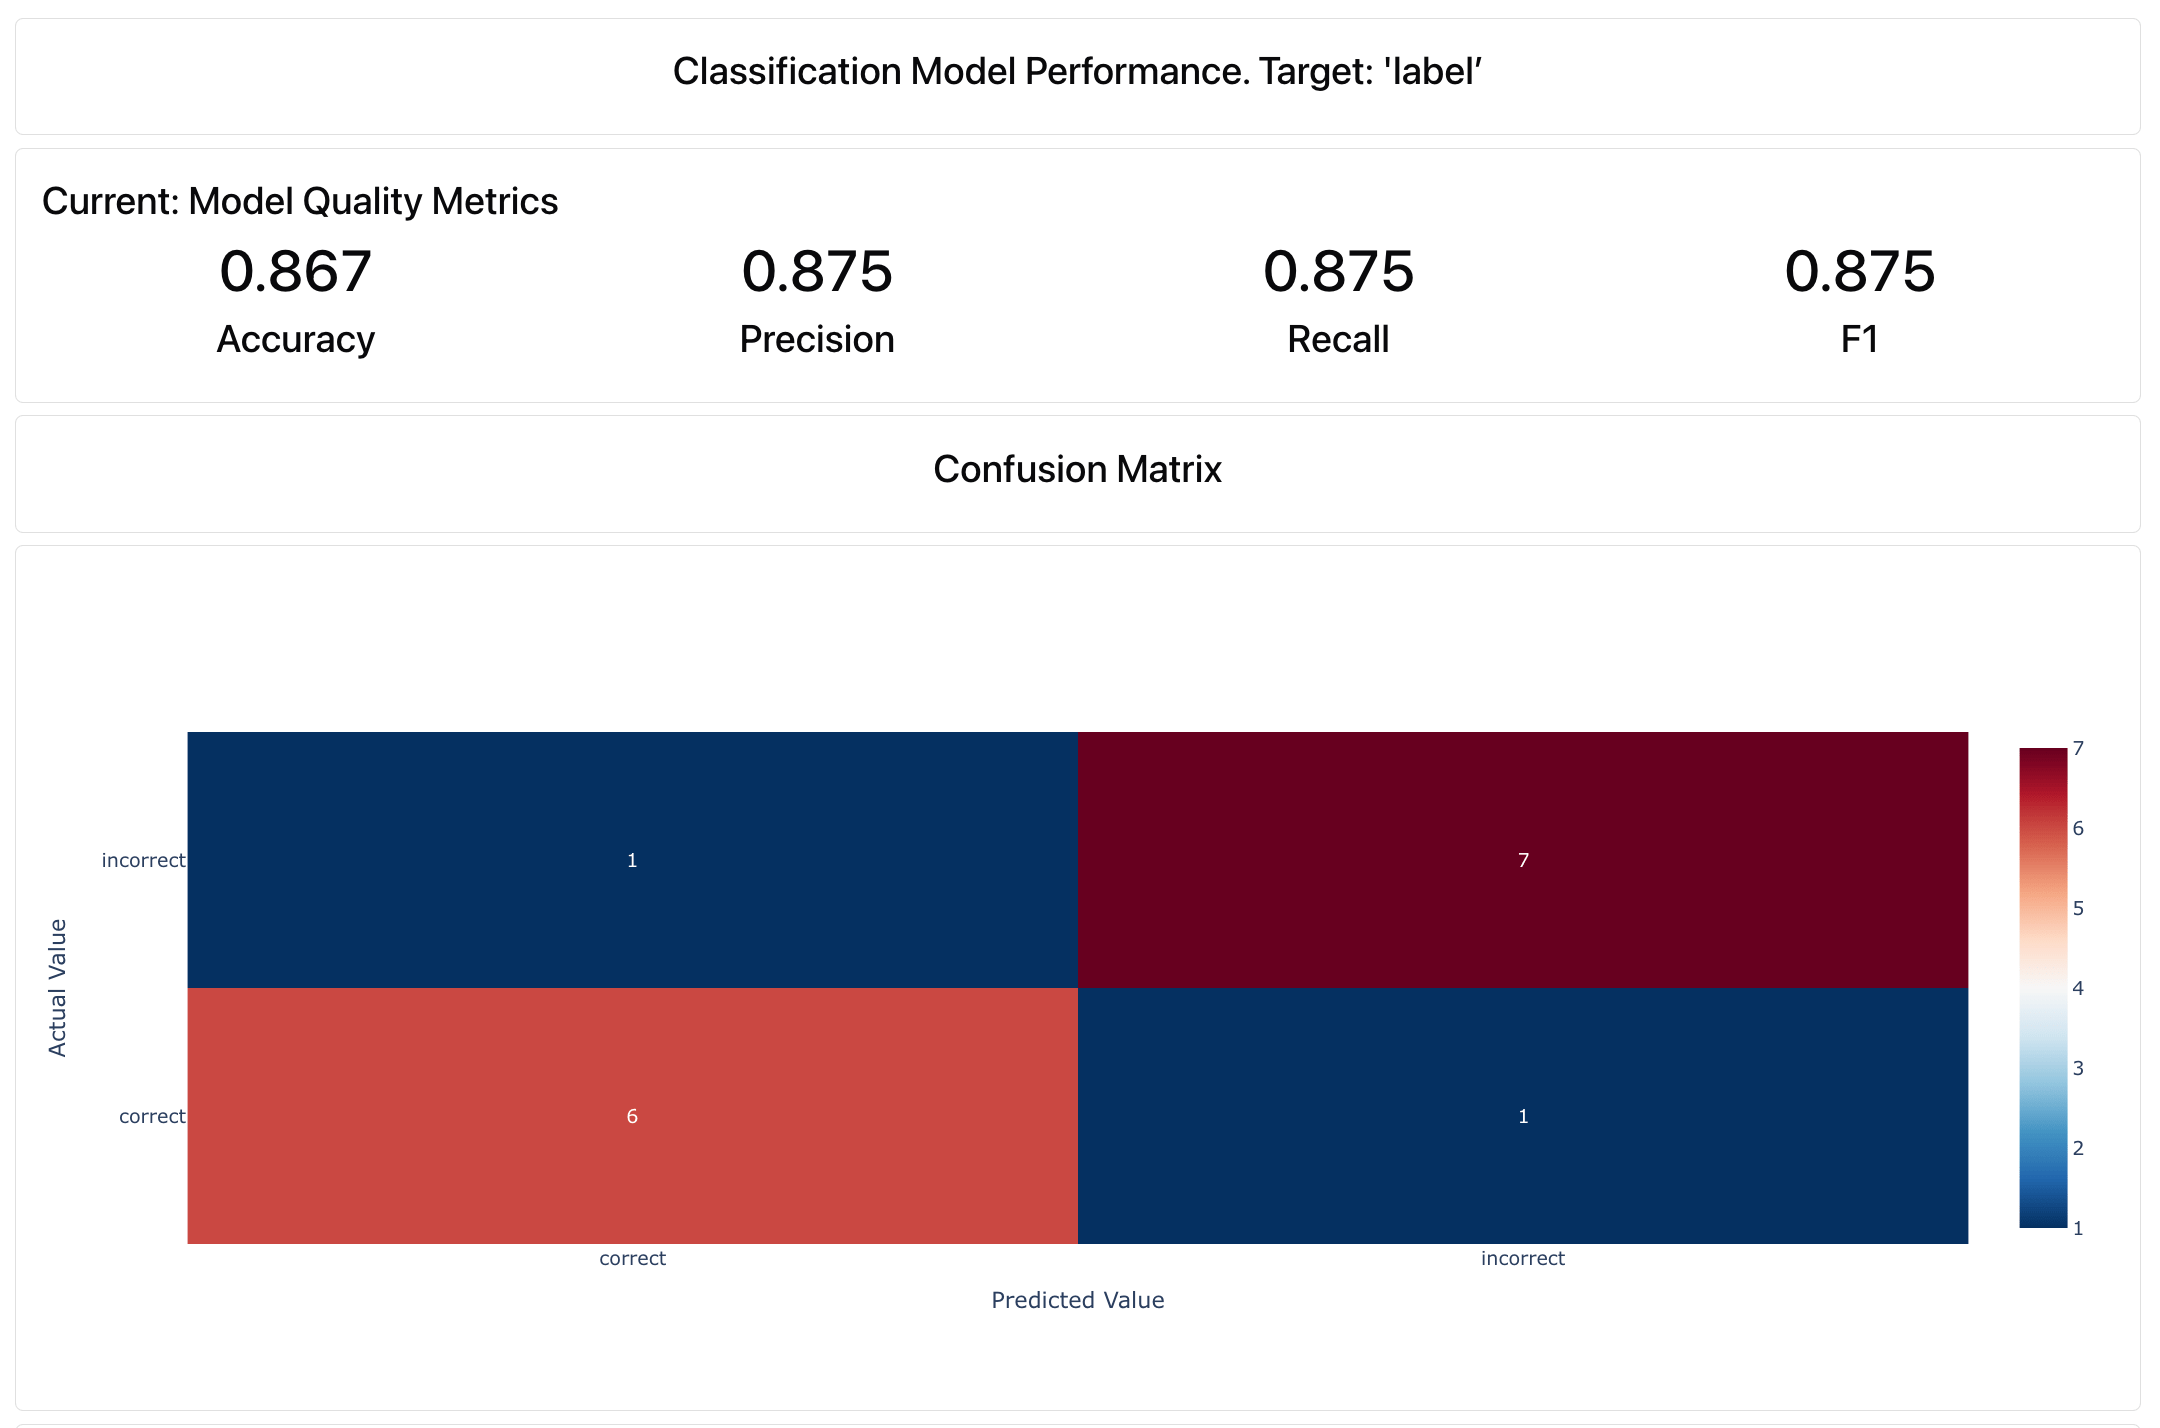
4. Evaluate the LLM Eval quality
This part is a bit meta: we’re going to evaluate the quality of our LLM evaluator itself! We can treat it as a simple binary classification problem. Data definition. To evaluate the classification quality, we need to map the structure of the dataset accordingly first. The column with the manual label is the “target”, and the LLM-judge response is the “prediction”:Pos_label refers to the class that is treated as the target (“what we want to predict better”) for metrics like precision, recall, F1-score.ClassificationPreset() that combines several classification metrics:
5. Verbosity evaluator
Next, let’s create a simpler verbosity judge. It will check whether the responses are concise and to the point. This only requires evaluating one output column: such checks are perfect for production evaluations where you don’t have a reference answer. Here’s how to set up the prompt template for verbosity: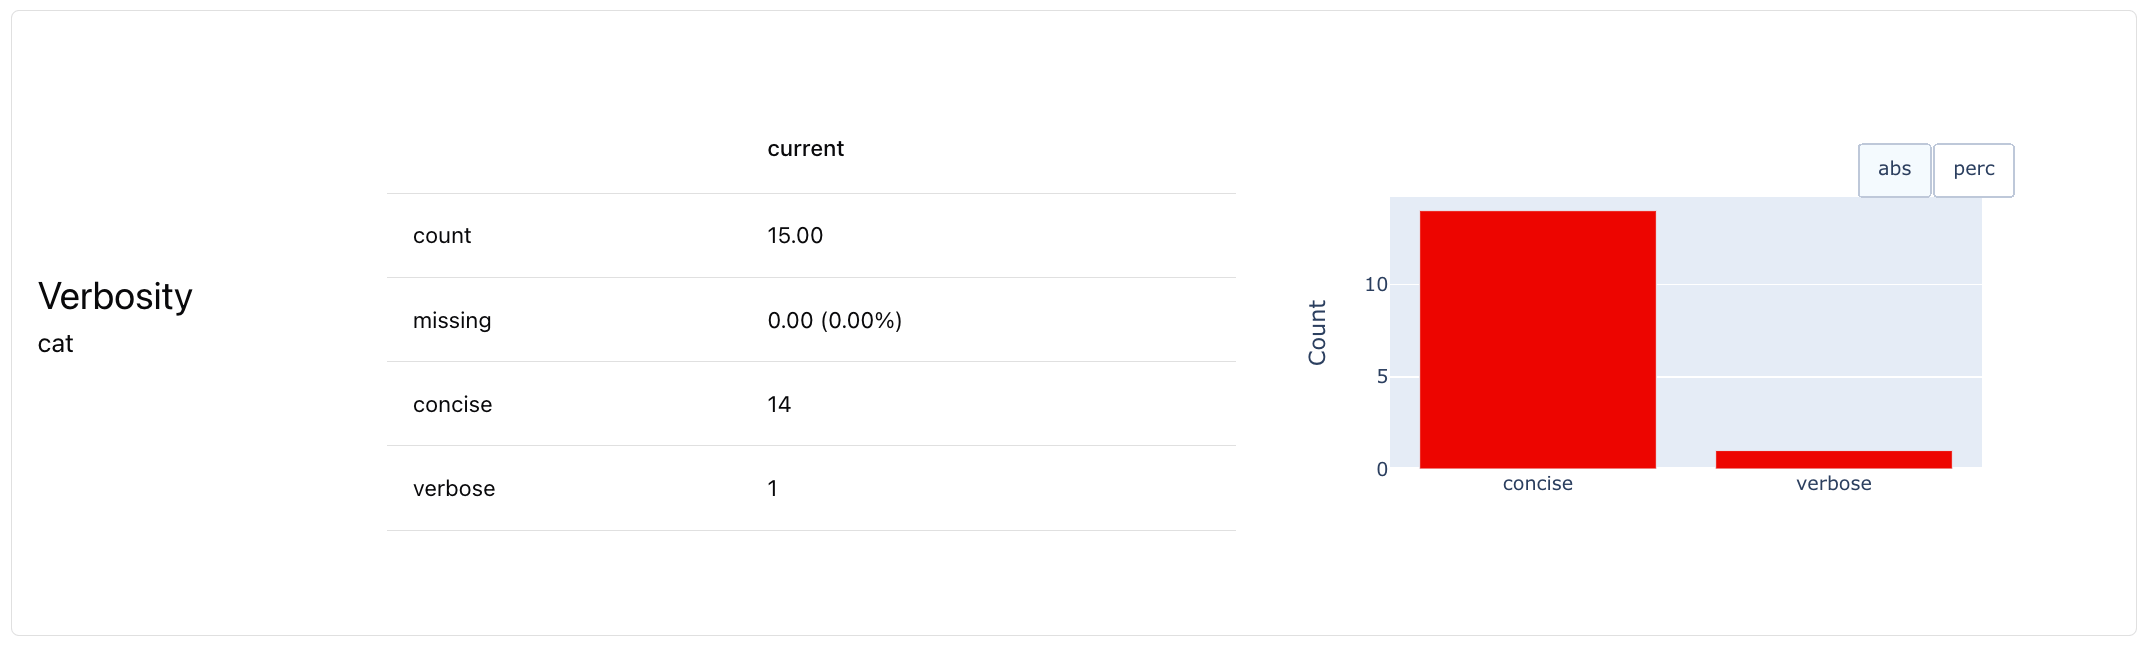
eval_dataset.as_dataframe()
Don’t fully agree with the results? Use these labels as a starting point, edit the decisions where you see fit - now you’ve got your golden dataset! Next, iterate on your judge prompt. You can also try different evaluator LLMs to see which one does the job better. How to change an LLM.
What’s next?
The LLM judge itself is just one part of your overall evaluation framework. You can integrate this evaluator into different workflows, such as testing your LLM outputs after changing a prompt. To be able to easily run and compare evals, systematically track the results, and interact with your evaluation dataset, you can use the Evidently Cloud platform.Set up Evidently Cloud
- Sign up for a free Evidently Cloud account.
- Create an Organization if you log in for the first time. Get an ID of your organization. (Link).
- Get an API token. Click the Key icon in the left menu. Generate and save the token. (Link).
Create a Project
Connect to Evidently Cloud using your API token:Send your eval
Since you already created the eval, you can simply upload it to the Evidently Cloud.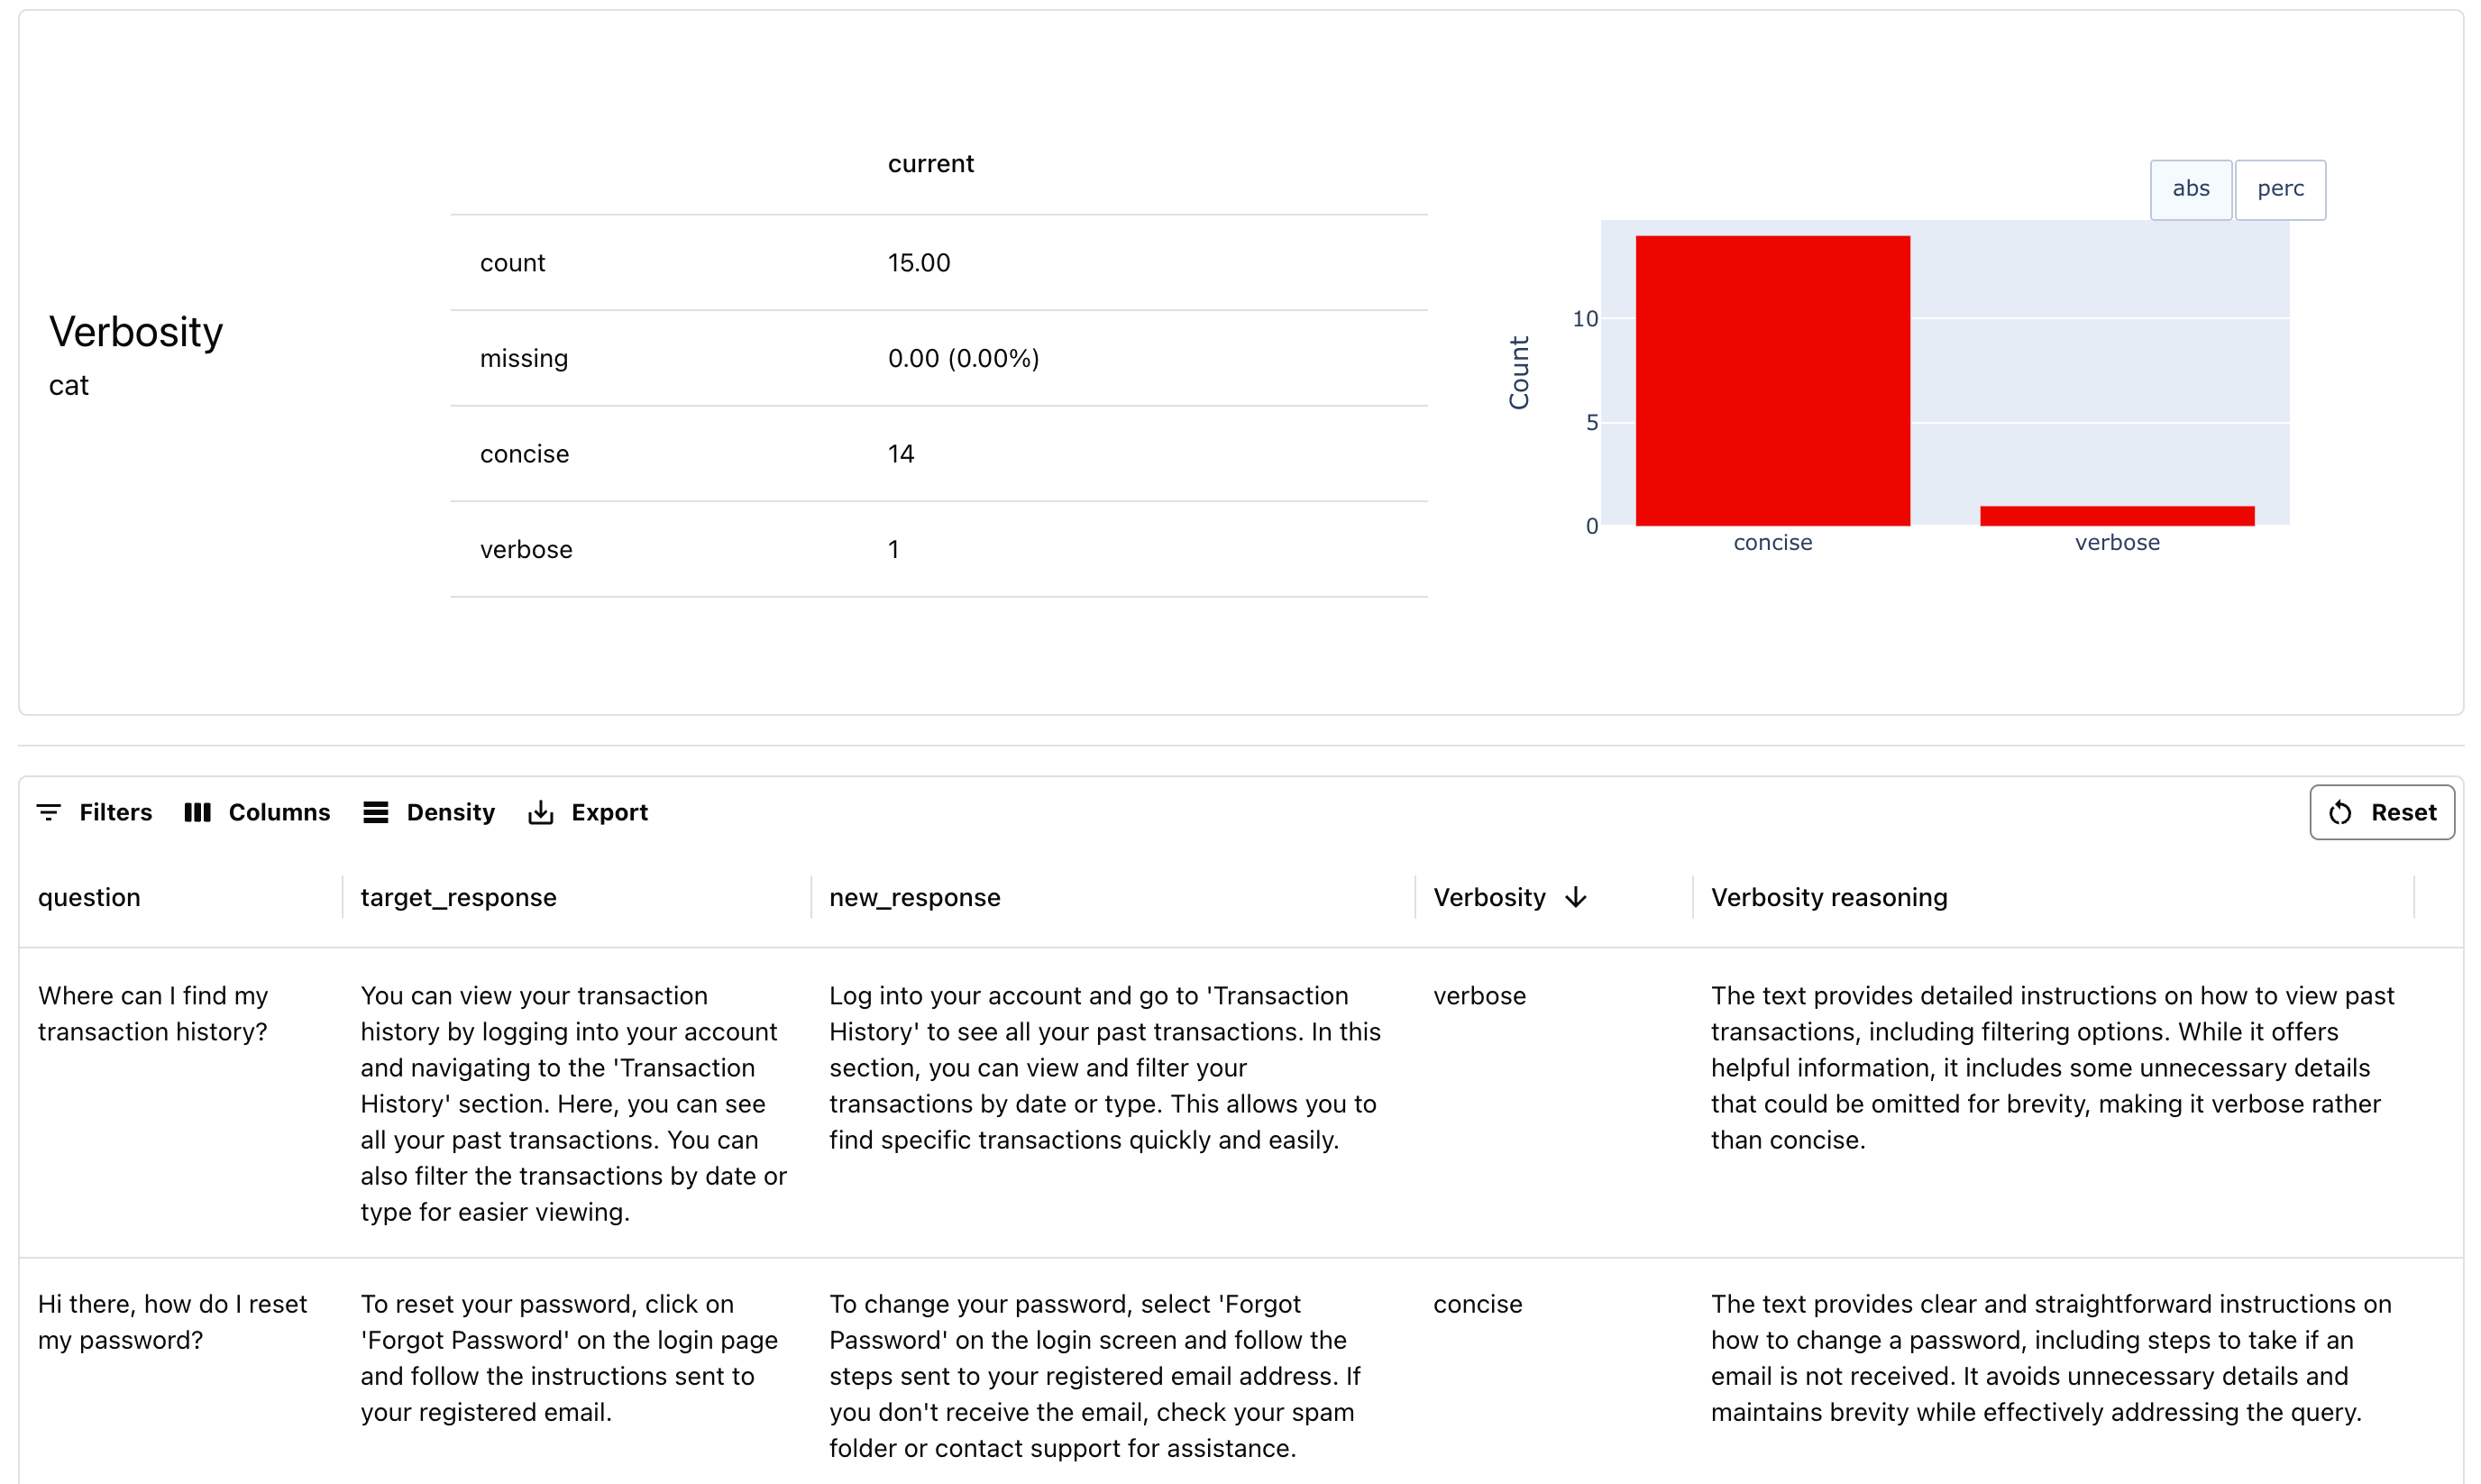
You can also create the LLM judges with no-code.