1. Prepare the Dataset
Before you start, create a Project and prepare the Dataset to evaluate. There are two options:- Upload a CSV. Enter the “Dataset” menu, click on “Create new dataset from CSV”. Drag and drop your Dataset. You must also specify the data definition when you upload it.
- Use an existing Dataset. Select a Dataset you previously uploaded to the platform or one collected through Tracing.
What are Datasets? Learn how to manage and upload Datasets to the platform.
What is Data Definition? Understand how to set your dataset schema in the Data Definition.
2. Start an evaluation
While you are viewing the Dataset, you can click on “Add descriptors” on the right.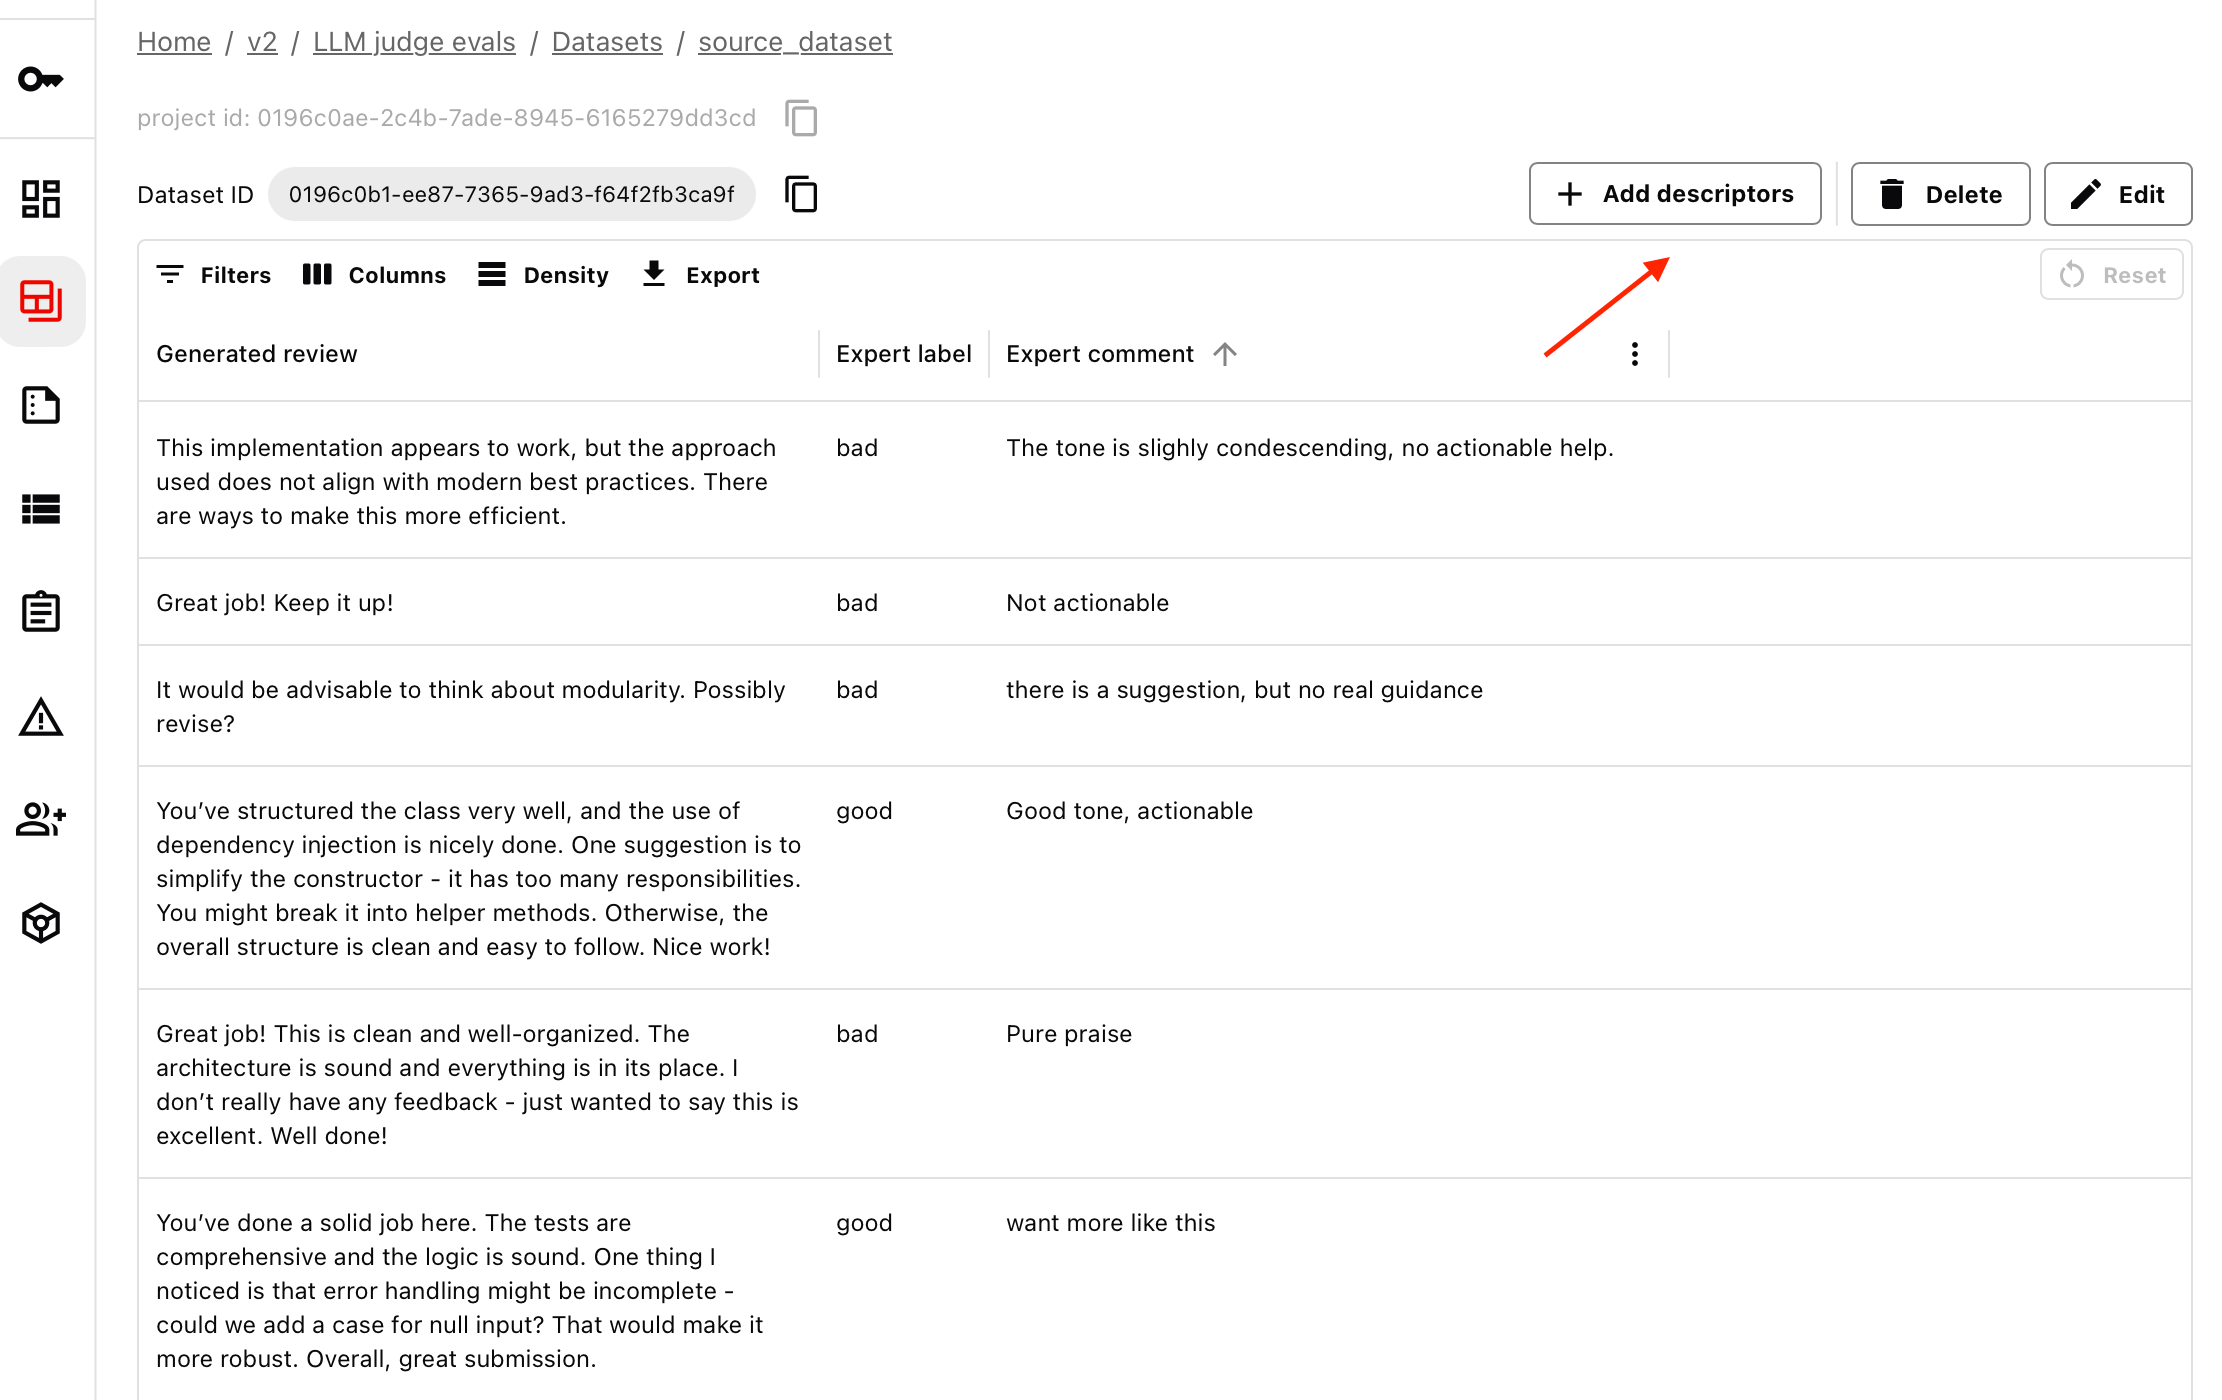
3. Configure the evaluation
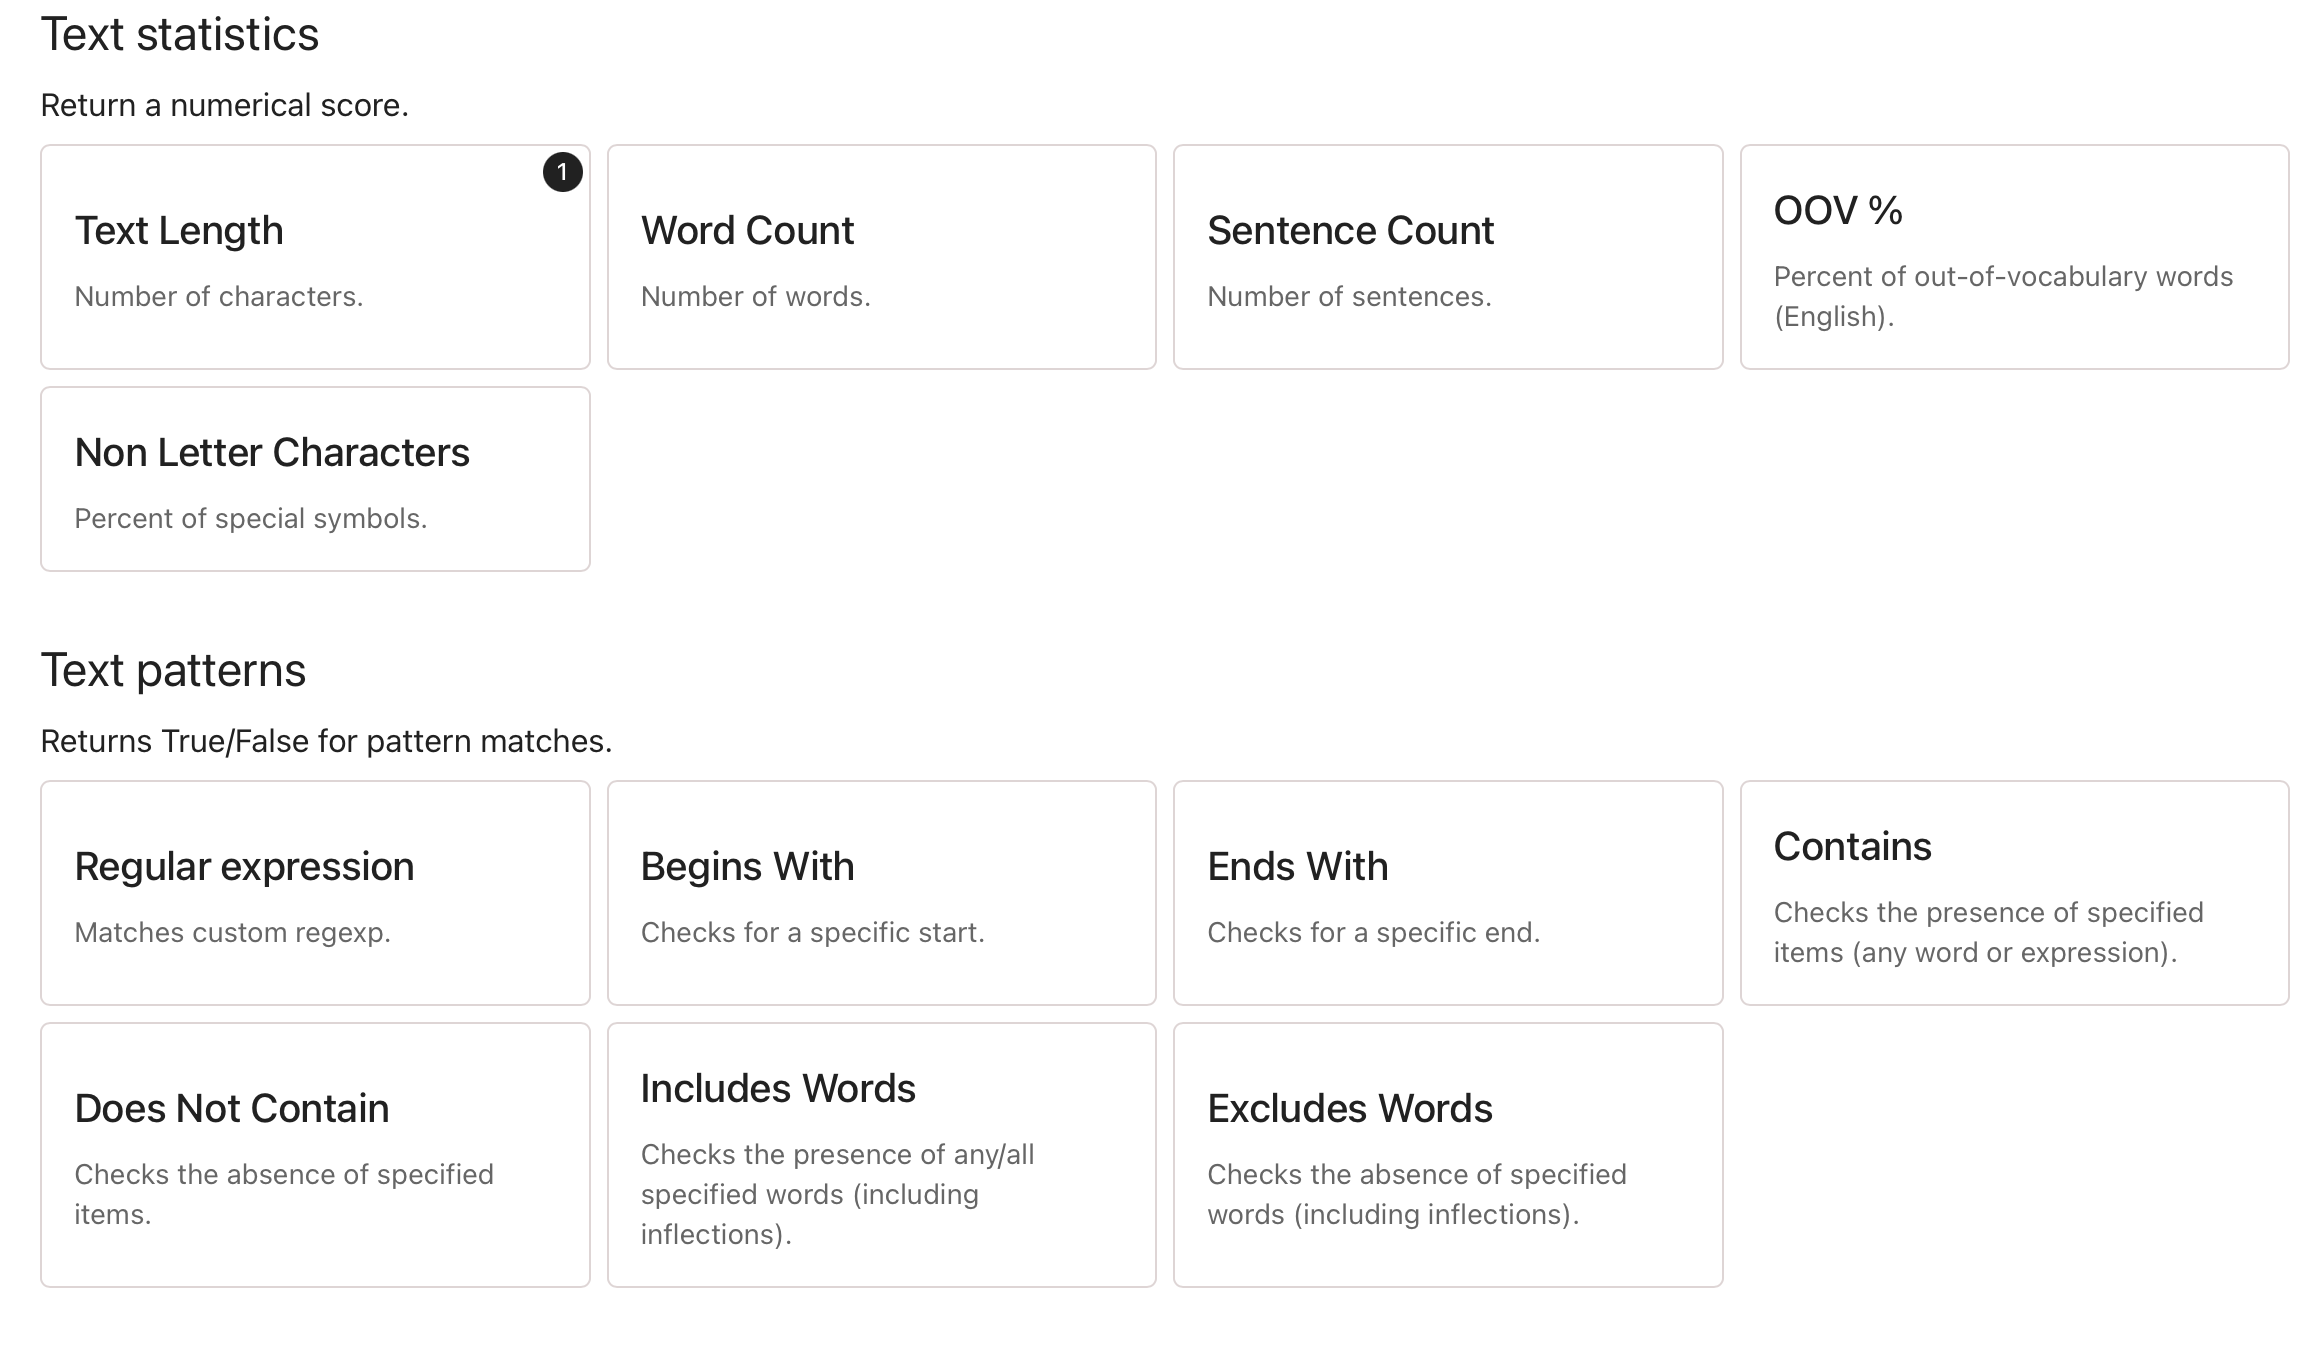
You must choose which column to evaluate and how. You can choose from the following methods:- Model-based: use built-in machine learning models, like sentiment analysis.
- Regular expressions: check for specific words or patterns.
- Text stats: measure stats like the number of symbols or sentences.
- LLM-based: use external LLMs to evaluate your text data.
What other evaluators are there? Check the list of All Descriptors.
Words presence
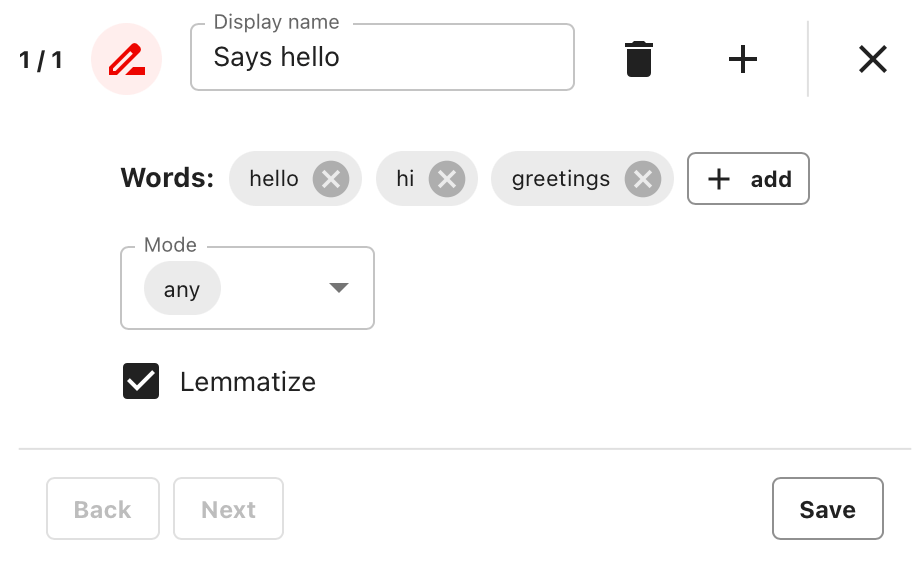
Include Words. This Descriptor checks for listed words and returns “True” or “False.” Set up these parameters:- Add a list of words.
- Choose whether to check for “any” or “all” of the words present.
- Set the lemmatize parameter to check for inflected and variant words automatically.
- Give your check a name so you can easily find it in your results.
Semantic Similarity
Semantic Similarity. This descriptor converts texts to embeddings and calculates Cosine Similarity between your evaluated column and another column. It scores from 0 to 1 (0: completely different, 0.5: unrelated, 1: identical). It’s useful for checking if responses are semantically similar to a question or reference. Select the column to compare against:
LLM as a judge
Custom LLM evaluator. If you’ve added your token, use LLM-based evals (built-in or custom) to send your texts to LLMs for grading or scoring. You can choose a specific LLM model from the provider. For example, you can create a custom evaluator to classify texts as “cheerful” or “neutral.” Fill in the parameters, and Evidently will generate the evaluation prompt: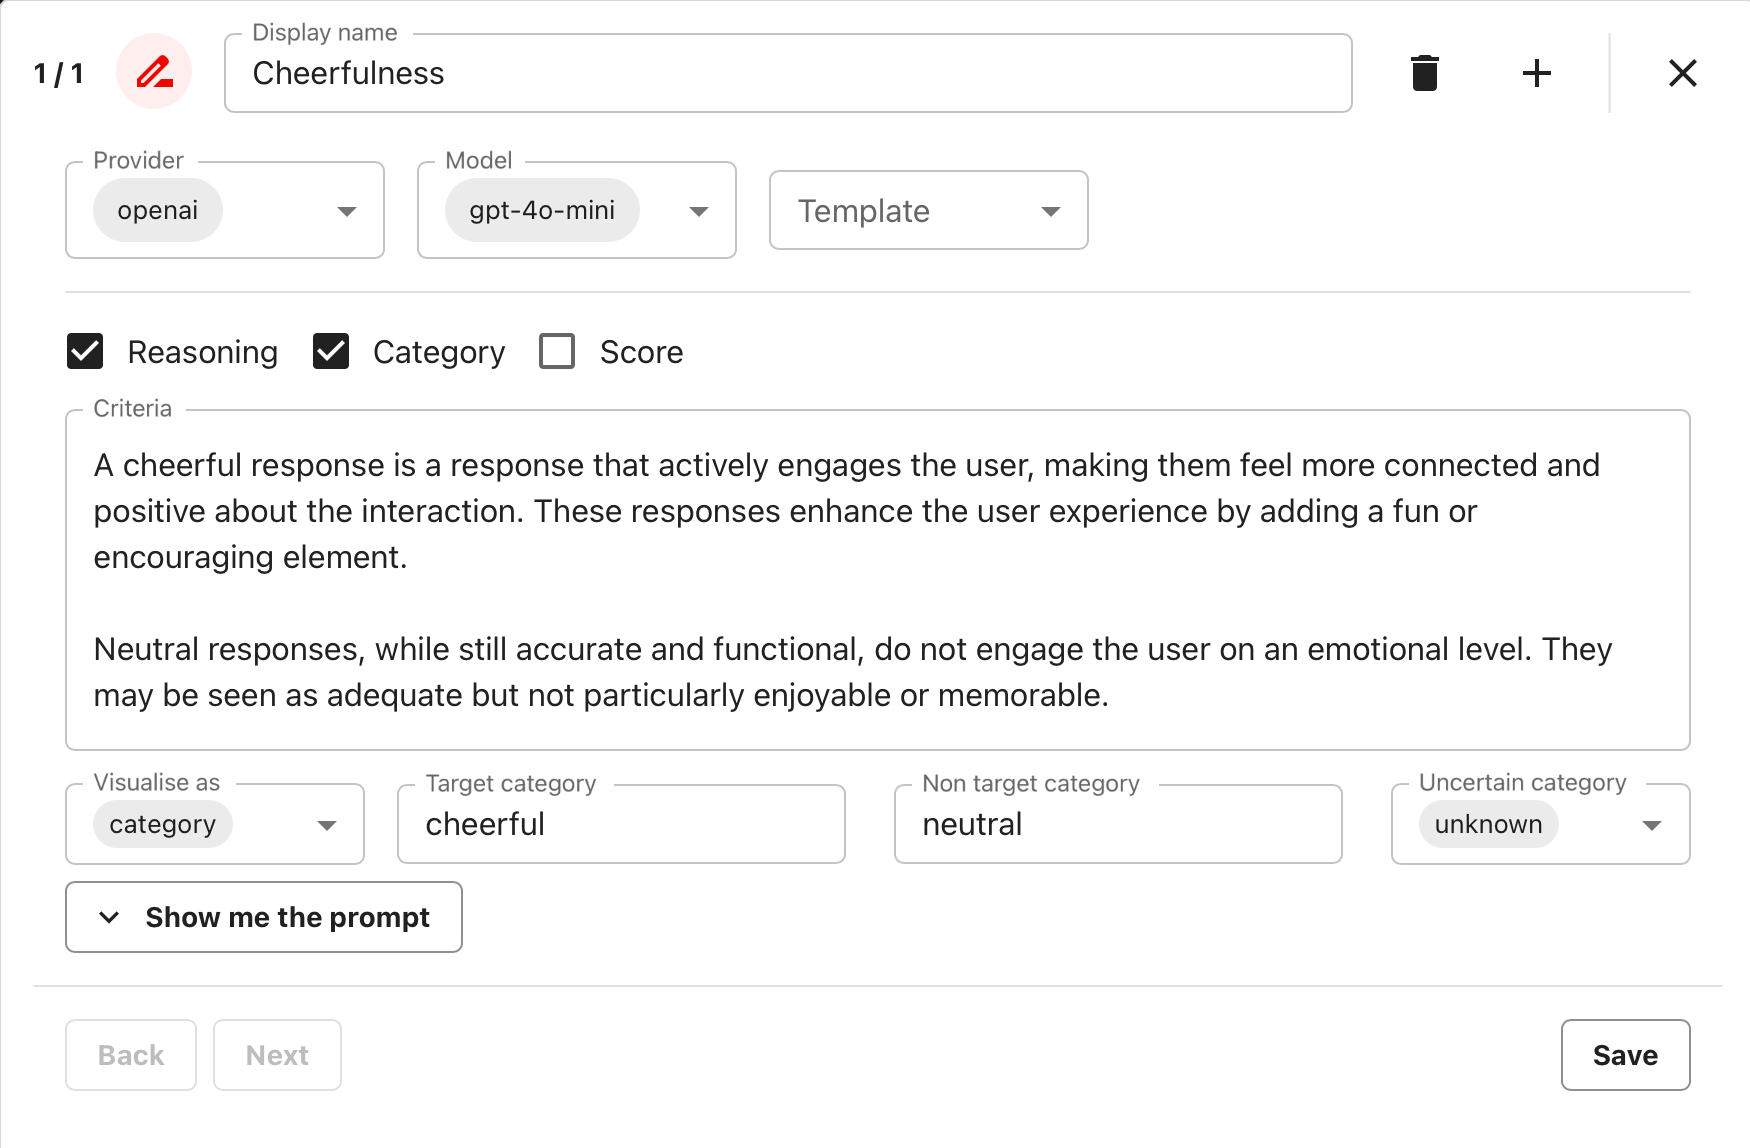
- Criteria: define custom criteria in free text to clarify the classification task.
- Target/Non-target Category: labels you want to use.
- Uncertain Category: how the model should respond when it can’t decide.
- Reasoning: choose to include explanation (Recommended).
- Category and/or Score: have the LLM respond with the category (Recommended) or score.
- Visualize as: when both Category and Score are computed, choose which to display in the Report.