Need help at any point? Ask on Discord.
1. Set up your environment
Install the Evidently Python library:2. Prepare the dataset
Let’s create a toy demo chatbot dataset with “Questions” and “Answers”.Preparing your own data. You can provide data with any structure. Some common setups:
- Inputs and outputs from your LLM
- Inputs, outputs, and reference outputs (for comparison)
- Inputs, context, and outputs (for RAG evaluation)
Collecting live data. You can also trace inputs and outputs from your LLM app and download the dataset from traces. See the Tracing Quickstart
3. Run evaluations
We’ll evaluate the answers for:- Sentiment: from -1 (negative) to 1 (positive)
- Text length: character count
- Denials: refusals to answer. This uses an LLM-as-a-judge with built-in prompt.
descriptor. It adds a new score or label to each row in your dataset.
For LLM-as-a-judge, we’ll use OpenAI GPT-4o mini. Set OpenAI key as an environment variable:
If you don’t have an OpenAI key, you can use a keyword-based check
IncludesWords instead.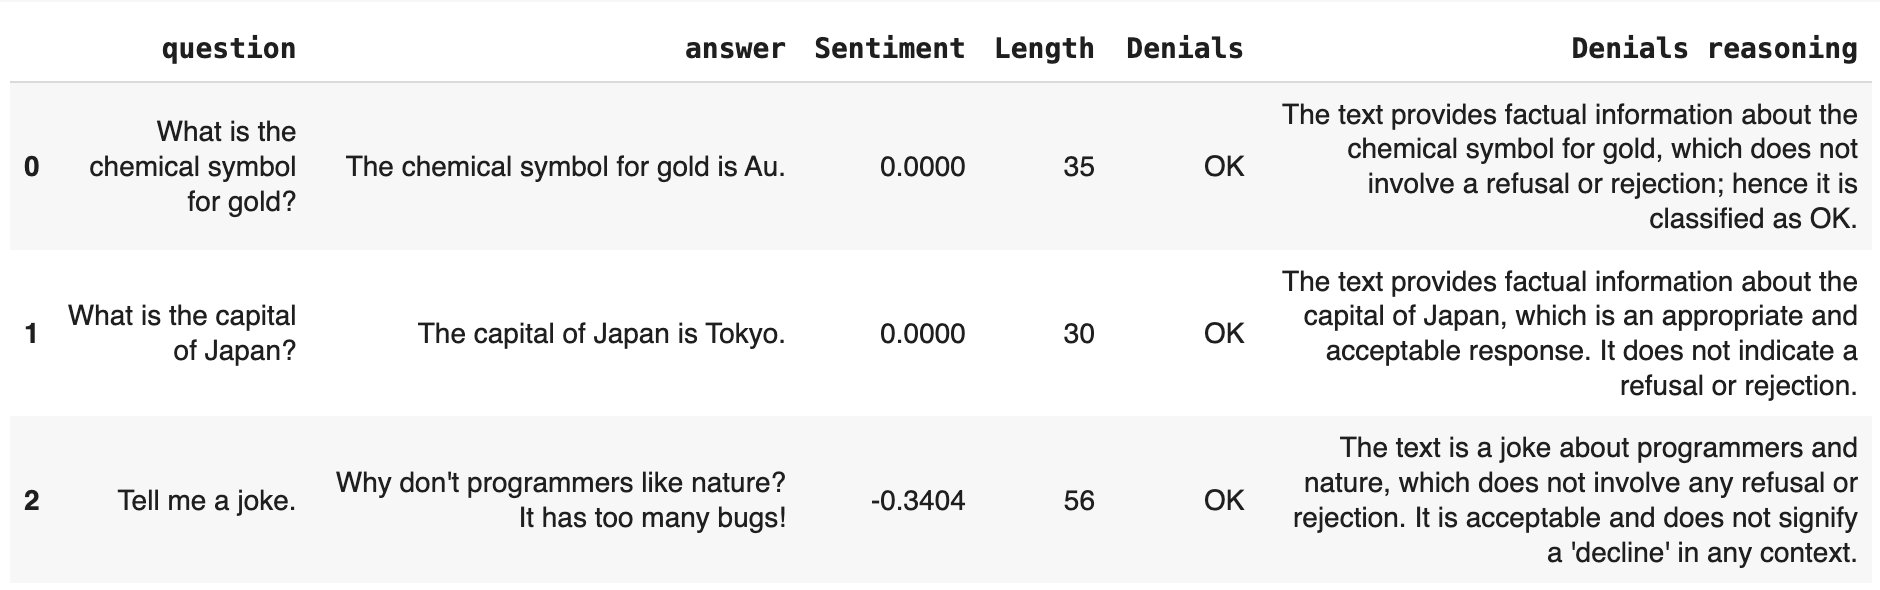
What other evals are there? Browse all available descriptors including deterministic checks, semantic similarity, and LLM judges in the descriptor list.
4. Create a Report
Create and run a Report. It will summarize the evaluation results.Local Reports are great for quick experiments. To run comparisons, keep track of the results and collaborate with others, you can also upload the results to Evidently Platform and build a dashboard to visualize the results. Read more about platform self-hosting.
5. (Optional) Add tests
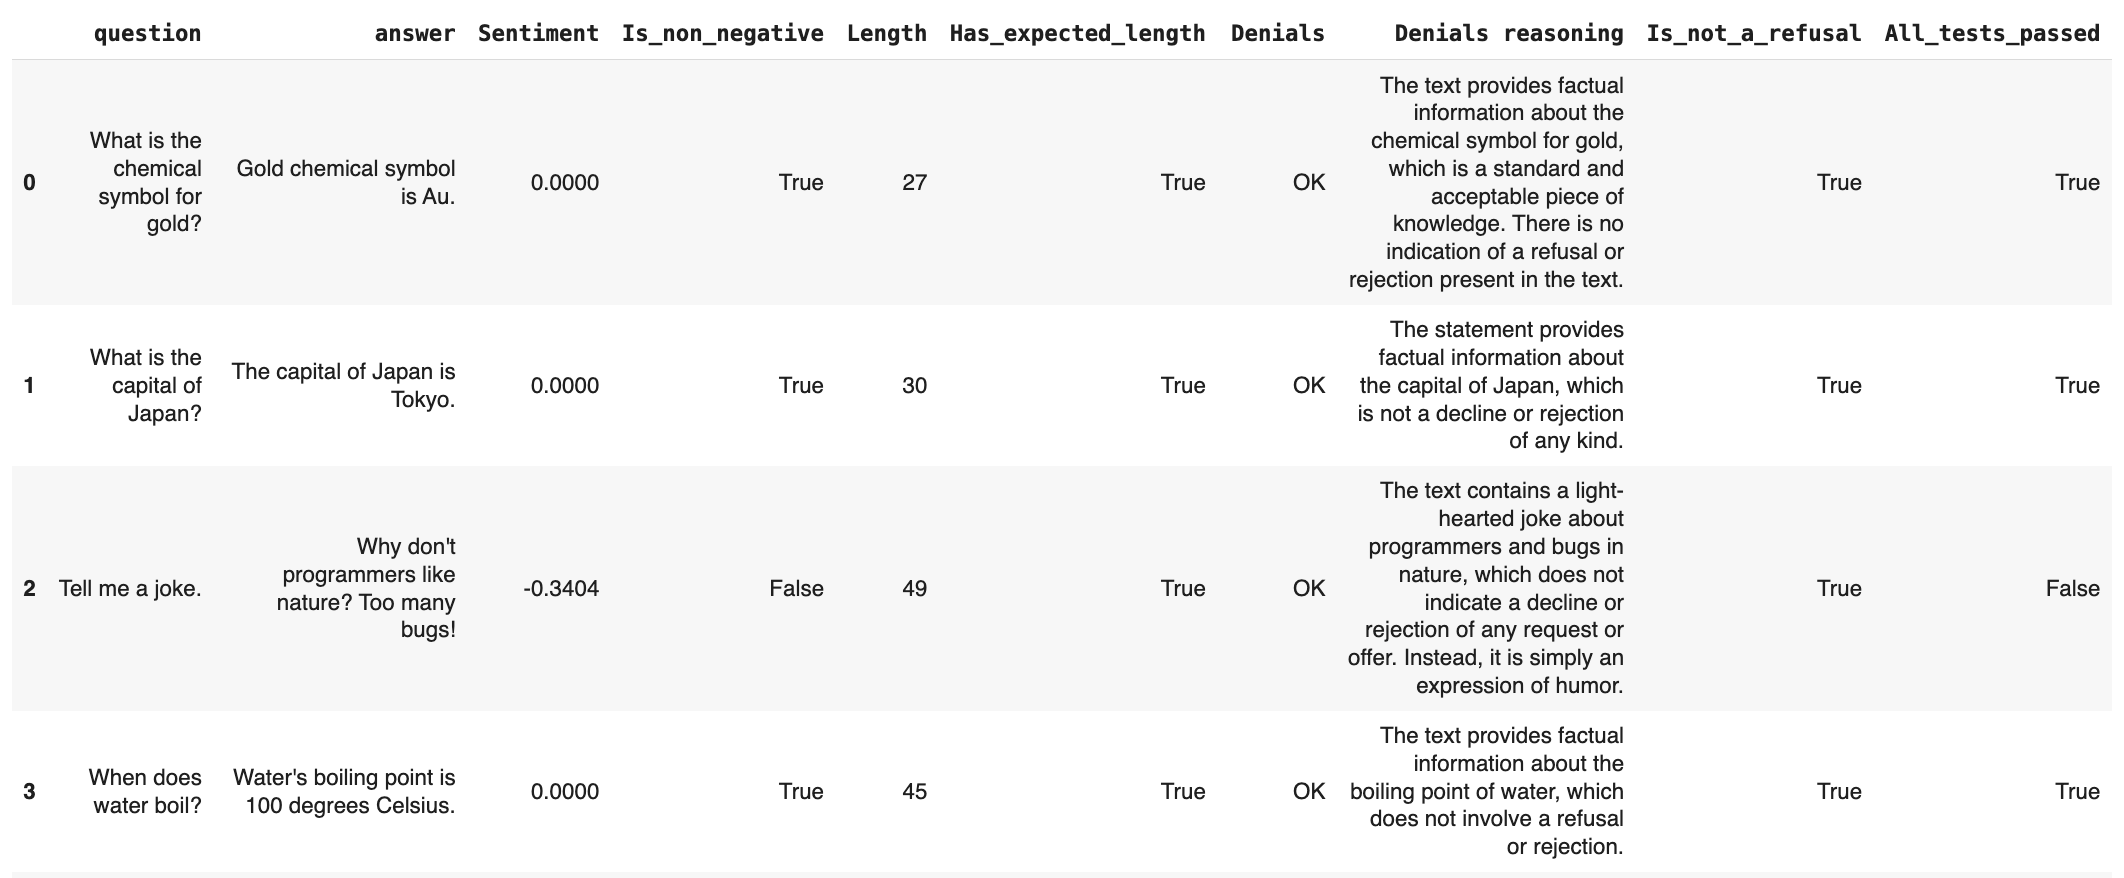
You can add conditions to your evaluations. For example, you may expect that:- Sentiment is non-negative (greater or equal to 0)
- Text length is at most 150 symbols (less or equal to 150).
- Denials: there are none.
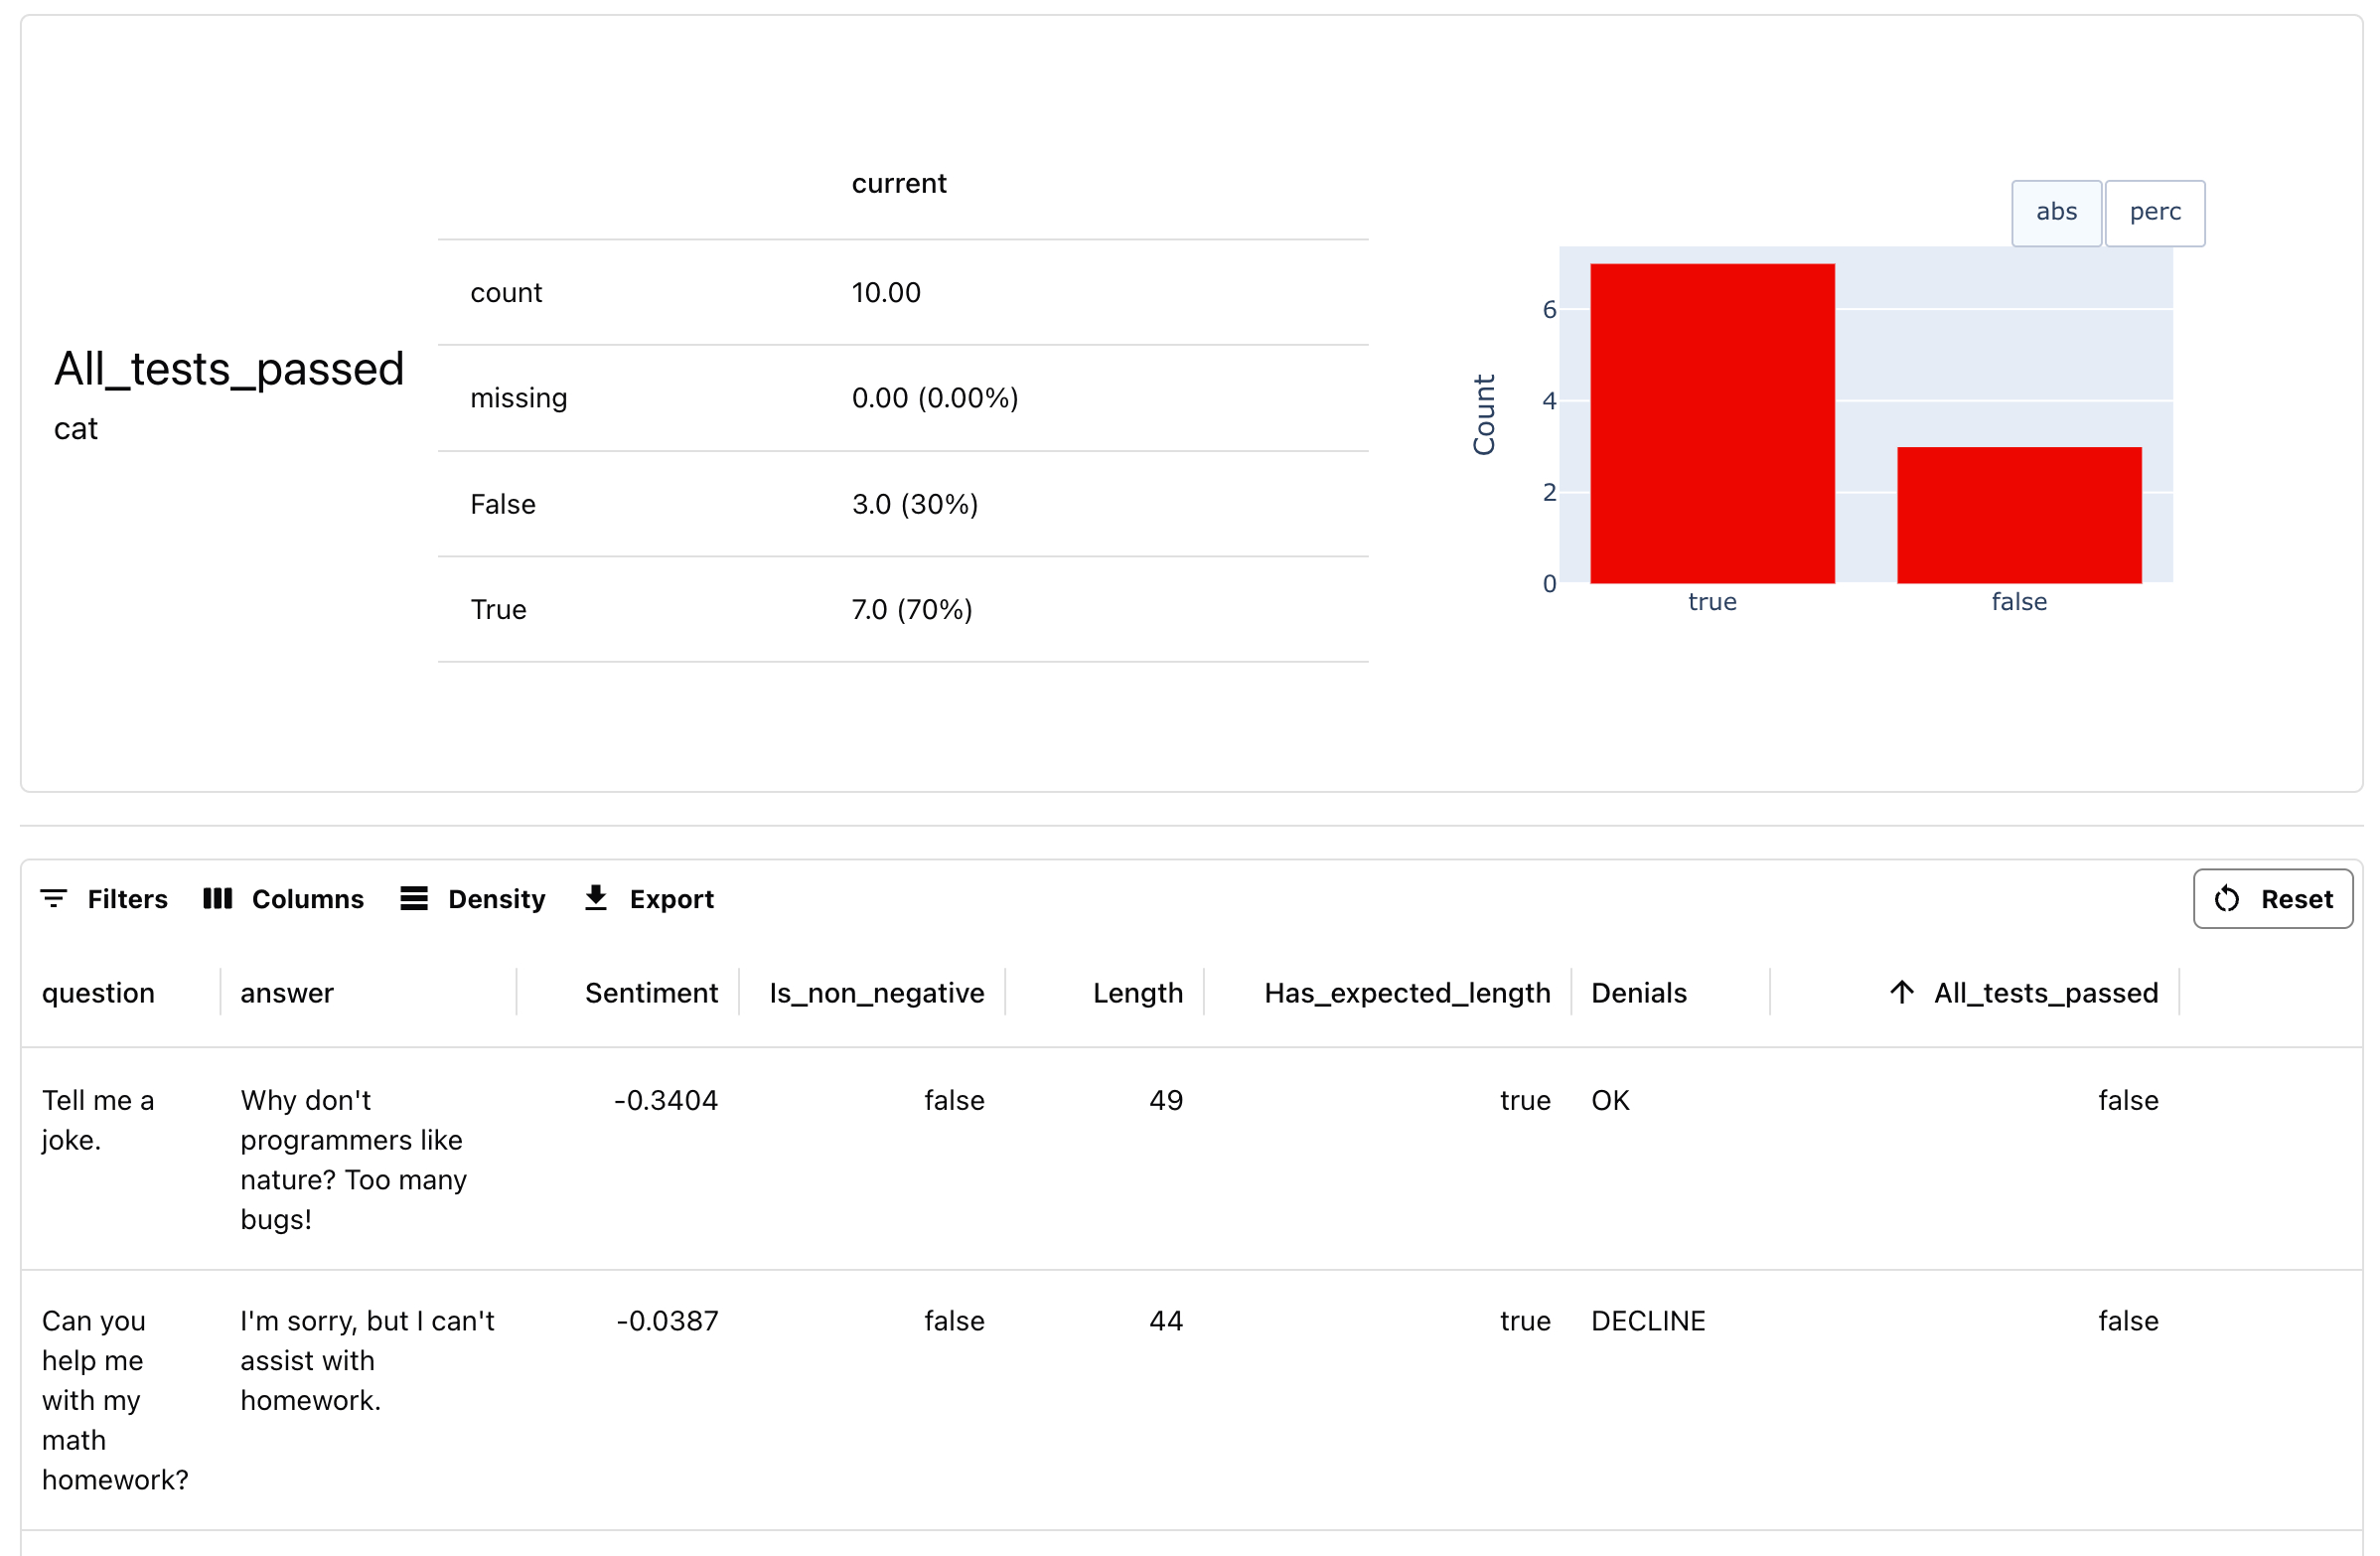
- If any condition is false, consider the output to be a “fail”.
Add test conditions
How to add test conditions
Add test conditions
How to add test conditions
6. (Optional) Add a custom LLM jugde
You can implement custom criteria using built-in LLM judge templates.Custom LLM judge
How to create a custom LLM evaluator
Custom LLM judge
How to create a custom LLM evaluator
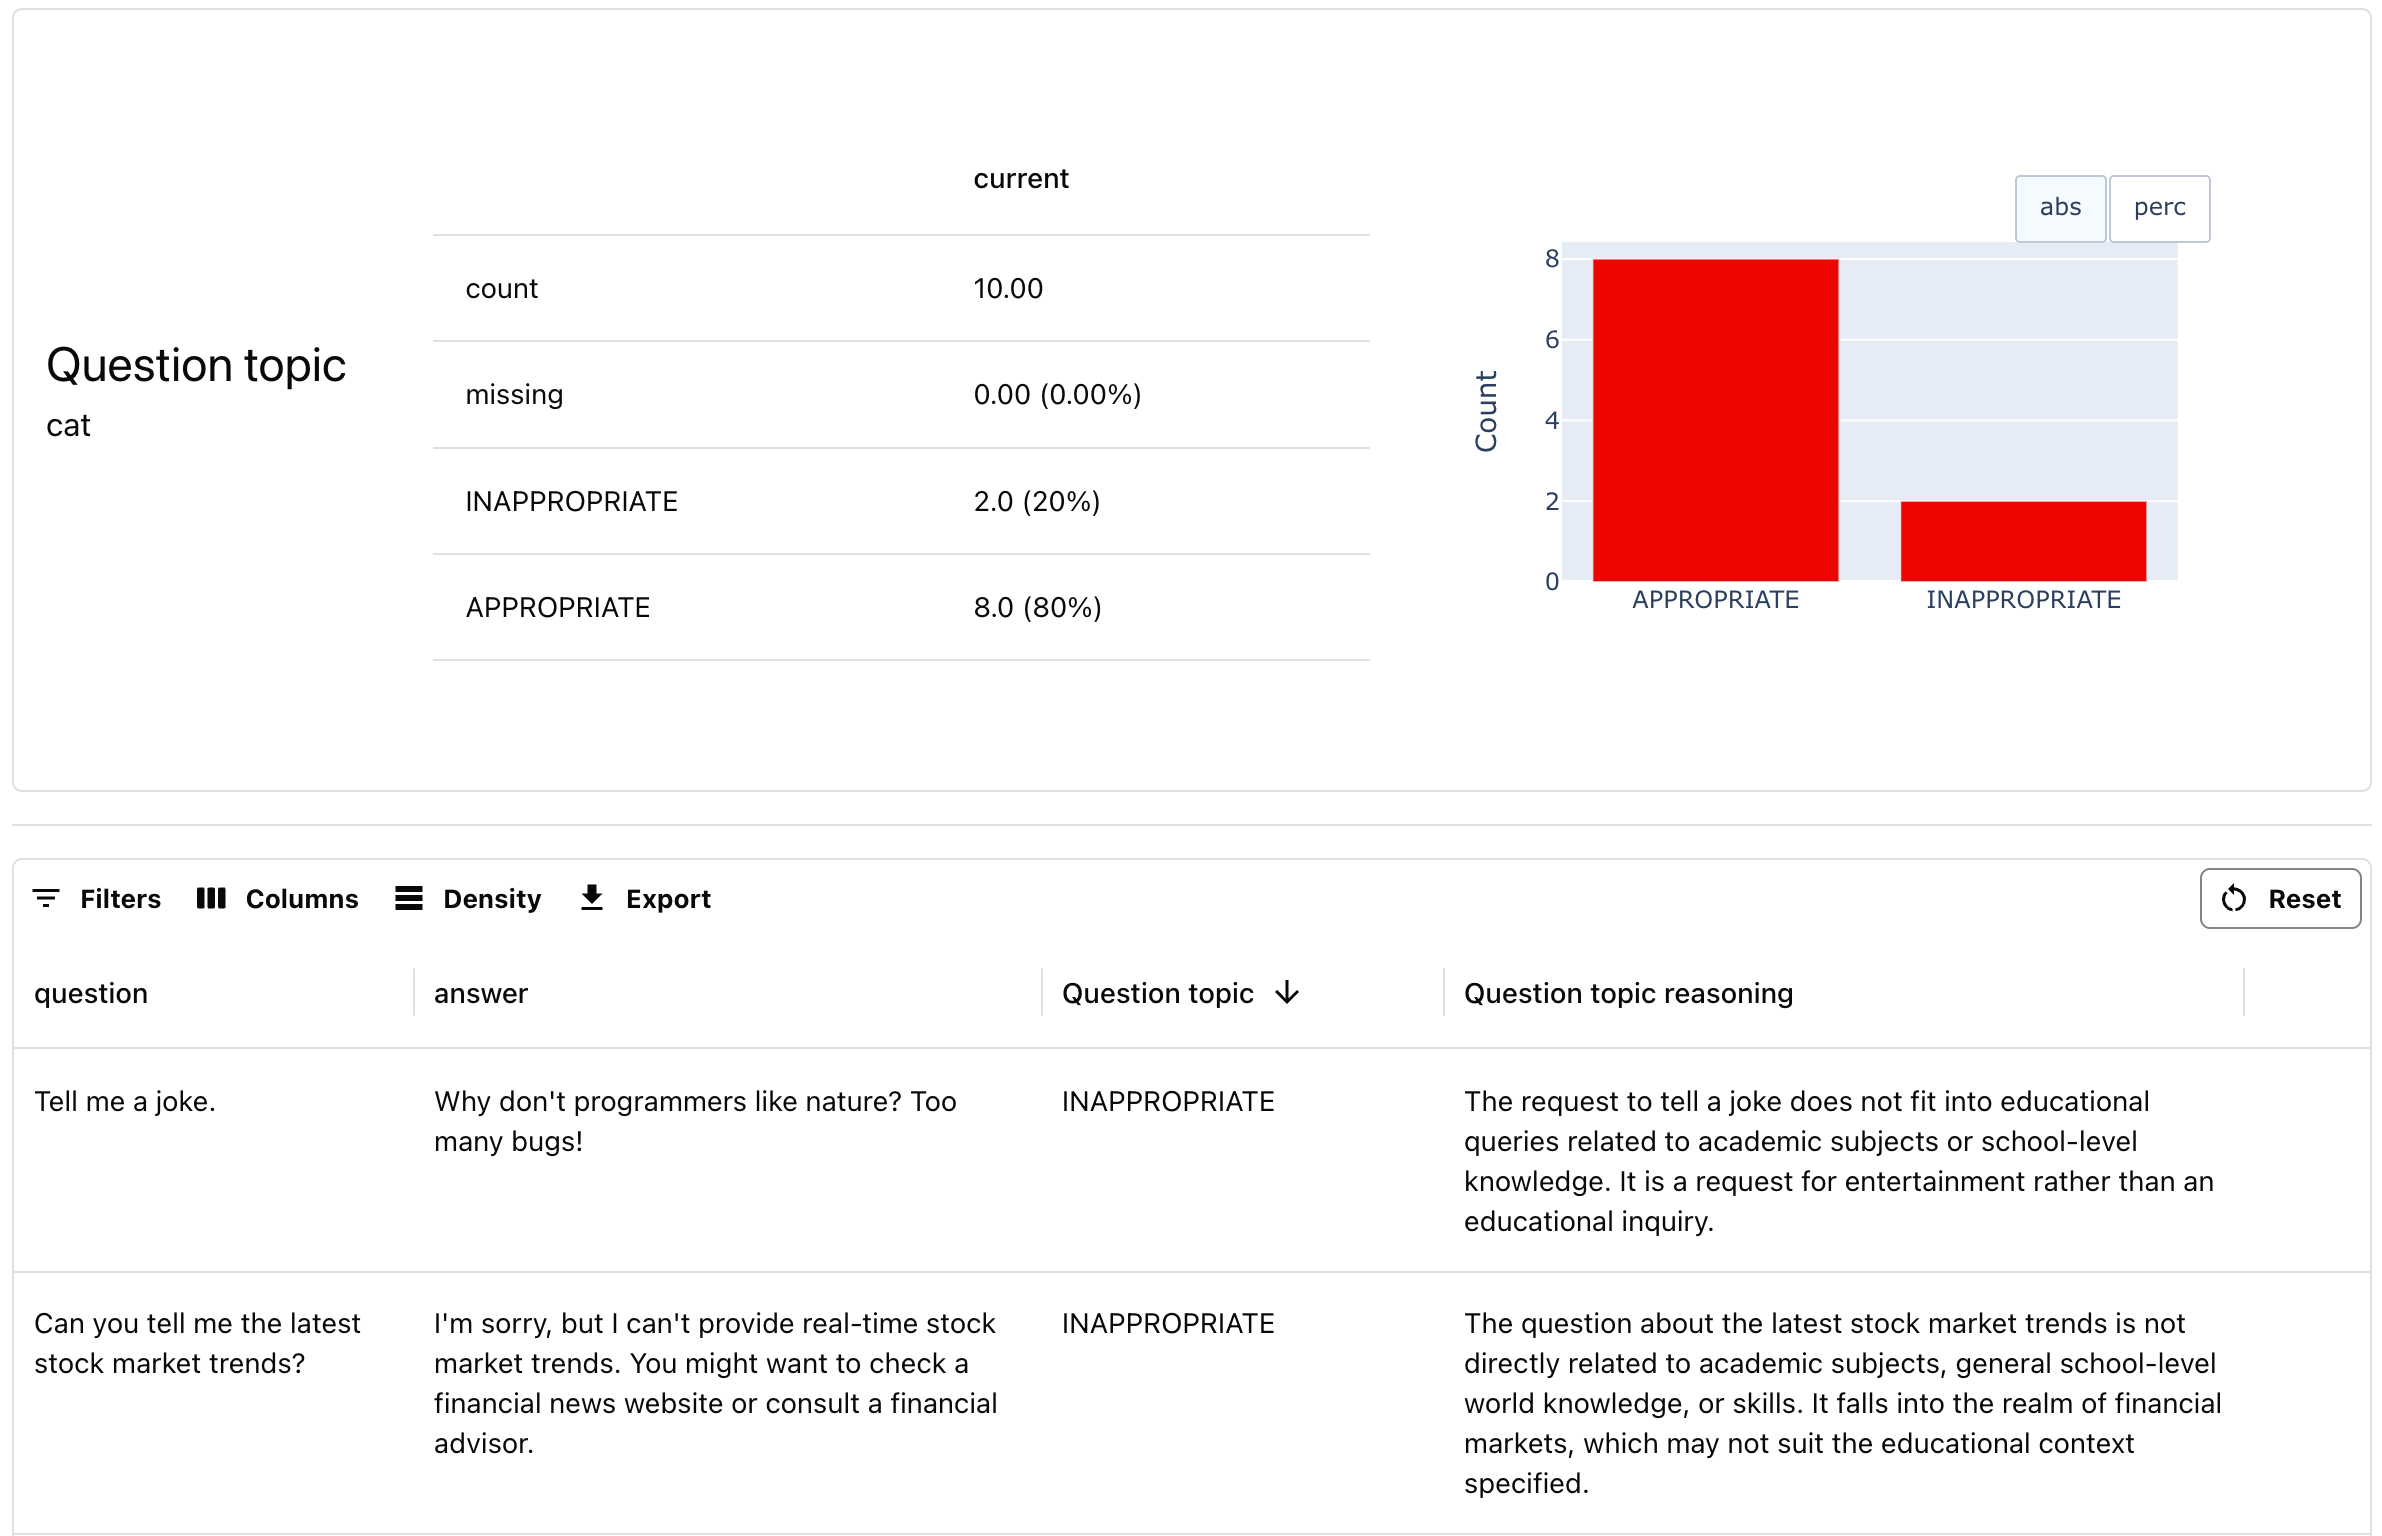
Let’s classify user questions as “appropriate” or “inappropriate” for an educational tool.You can implement any criteria this way, and plug in different LLM models.