> ## Documentation Index
> Fetch the complete documentation index at: https://docs.evidentlyai.com/llms.txt
> Use this file to discover all available pages before exploring further.
# Tracing
> How to capture LLM inputs and outputs and evaluate them.
This tutorial shows how to set up tracing for an LLM app, collect its inputs and outputs, view them in Evidently platform, and optionally run evaluations. You will use the following tools:
* **Tracely**: An open-source tracing library based on OpenTelemetry.
* **Evidently**: An open-source library to run LLM evaluations and interact with Evidently Platform
* **Evidently Platform:** A web platform to view traces and run evaluations.
* **OpenAI**: Used to simulate an LLM application.
Evidently Cloud is no longer available as a SaaS product, but you can [self-host the open-source Evidently Platform](https://docs.evidentlyai.com/docs/setup/self-hosting) to store and view your tracing results.
Need help? Ask on [Discord](https://discord.com/invite/xZjKRaNp8b).
## 1. Installation
Install the necessary libraries:
```python theme={null}
! pip install evidently
! pip install tracely
! pip install openai
```
Import the required modules:
```python theme={null}
import os
import openai
import time
import uuid
from tracely import init_tracing
from tracely import trace_event
from tracely import create_trace_event
from evidently.ui.workspace import CloudWorkspace
```
**Optional**. To load the traced dataset back to Python and run evals.
```python theme={null}
import pandas as pd
from evidently import Dataset
from evidently import DataDefinition
from evidently import Report
from evidently.descriptors import *
from evidently.presets import TextEvals
from evidently.metrics import *
from evidently.tests import *
```
## 2. Set up workspace
### 2.1. Set up Evidently Cloud
* **Sign up** for a free [Evidently Cloud account](https://app.evidently.cloud/signup).
* **Create an Organization** if you log in for the first time. Get an ID of your organization. ([Link](https://app.evidently.cloud/organizations)).
* **Get an API token**. Click the **Key** icon in the left menu. Generate and save the token. ([Link](https://app.evidently.cloud/token)).
### 2.2. Create a Project
Connect to Evidently Cloud using your API token:
```python theme={null} theme={null} theme={null}
ws = CloudWorkspace(token="YOUR_API_TOKEN", url="https://app.evidently.cloud")
```
Create a Project within your Organization, or connect to an existing Project:
```python theme={null} theme={null} theme={null}
project = ws.create_project("My project name", org_id="YOUR_ORG_ID")
project.description = "My project description"
project.save()
# or project = ws.get_project("PROJECT_ID")
```
### 2.3. Get Open AI key
Set up the OpenAI key ([Token page](https://platform.openai.com/api-keys)) as an environment variable. [See Open AI docs](https://help.openai.com/en/articles/5112595-best-practices-for-api-key-safety).
```python theme={null}
os.environ["OPENAI_API_KEY"] = "YOUR_KEY"
```
## 3. Configure tracing
Set up and initialize tracing:
```python theme={null}
project_id = str(project.id)
init_tracing(
address="https://app.evidently.cloud/",
api_key="YOUR_API_TOKEN",
project_id=project_id,
export_name="TRACING_DATASET"
)
```
* The `address` is the destination backend to store collected traces.
* `Project_id` is the ID of the Evidently Project you just created. Go to the [Home page](https://app.evidently.cloud/), enter the Project and copy its ID from above the dashboard.
* `Dataset_name` helps identify the resulting Tracing dataset. All data with the same ID is grouped into a single dataset.
## 4. Trace a simple LLM app
Let's create and trace a simple function that sends a list of questions to the LLM.
Initialize the OpenAI client with the API key:
```python theme={null}
client = openai.OpenAI(api_key=openai_api_key)
```
Define the list of questions to answer:
```python theme={null}
question_list = [
"What is Evidently Python library?",
"What is LLM observability?",
"How is MLOps different from LLMOps?",
"What is an LLM prompt?",
"Why should you care about LLM safety?"
]
```
Instruct the assistant to answer questions, and use the `create_trace_event` from `Tracely` to trace the execution of the function and treat each as a separate session. This loops through the list of questions, captures input arguments and outputs and sends the data to Evidently Cloud:
```python theme={null}
def qa_assistant(question):
system_prompt = "You are a helpful assistant. Please answer the following question in one sentence."
messages = [
{"role": "system", "content": system_prompt},
{"role": "user", "content": question},
]
return client.chat.completions.create(model="gpt-4o-mini", messages=messages).choices[0].message.content
# Iterate over the list of questions and pass each to the assistant
for question in question_list:
session_id = str(uuid.uuid4())
with create_trace_event("qa", session_id=session_id) as event:
response = qa_assistant(question=question)
event.set_attribute("question", question)
event.set_attribute("response", response)
time.sleep(1)
```
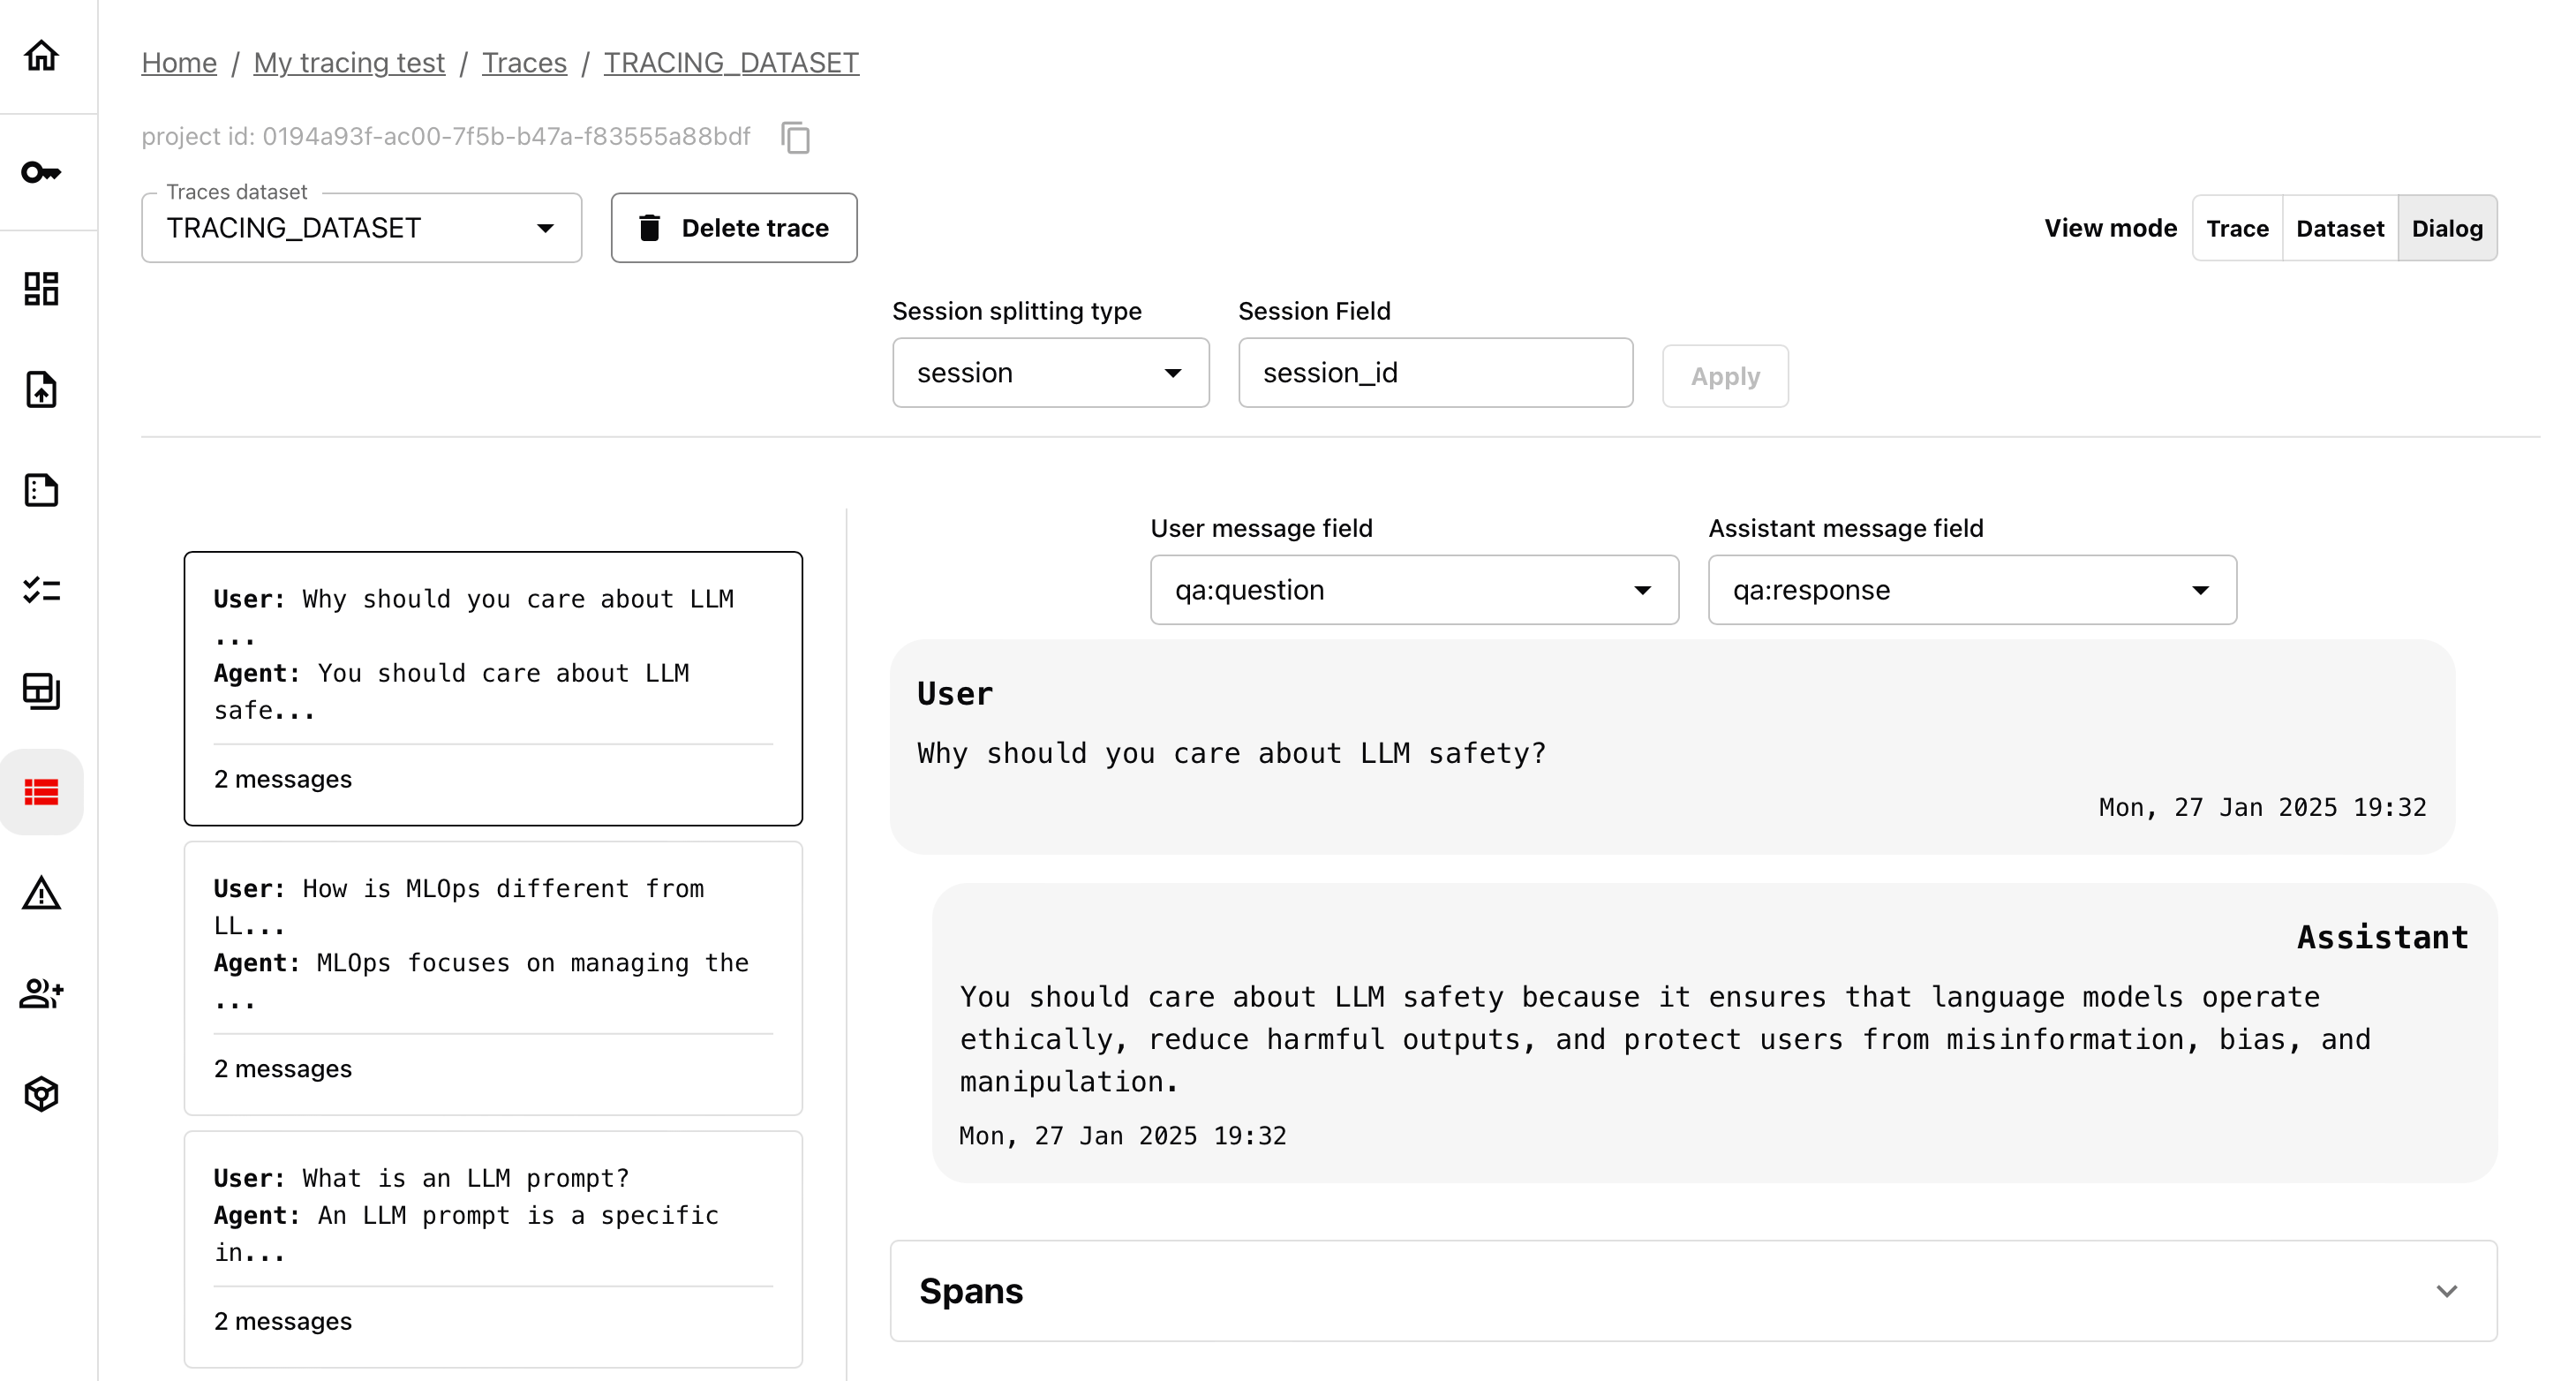
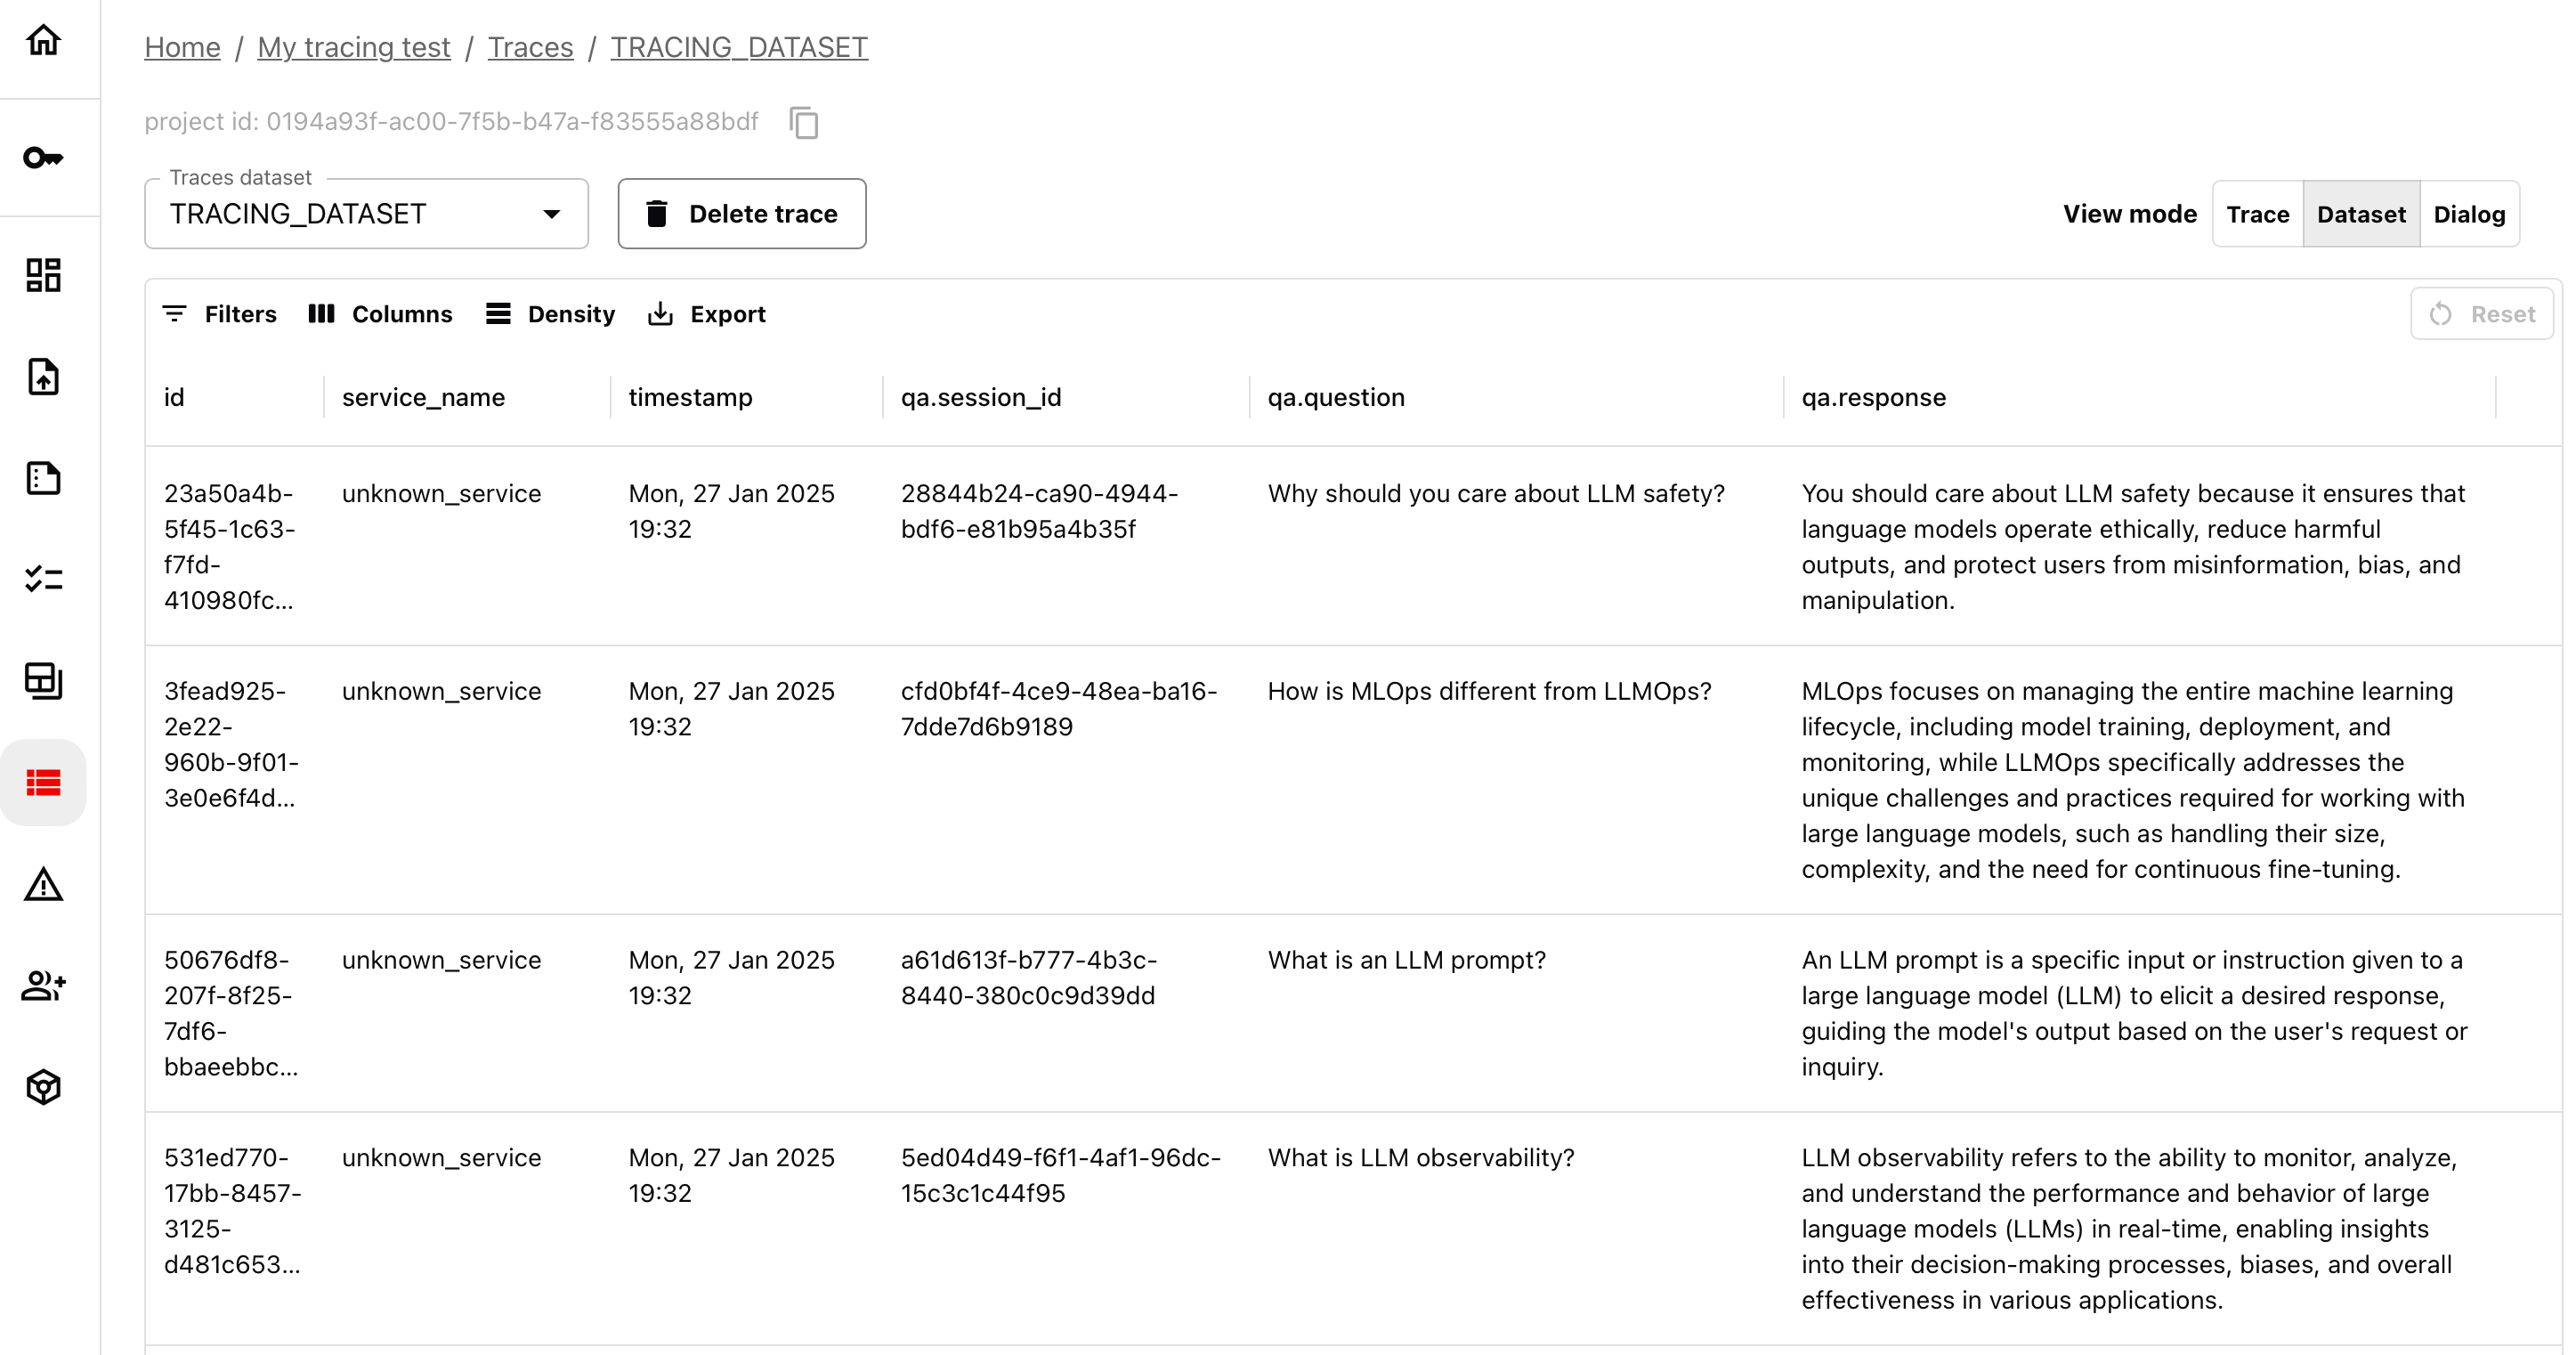
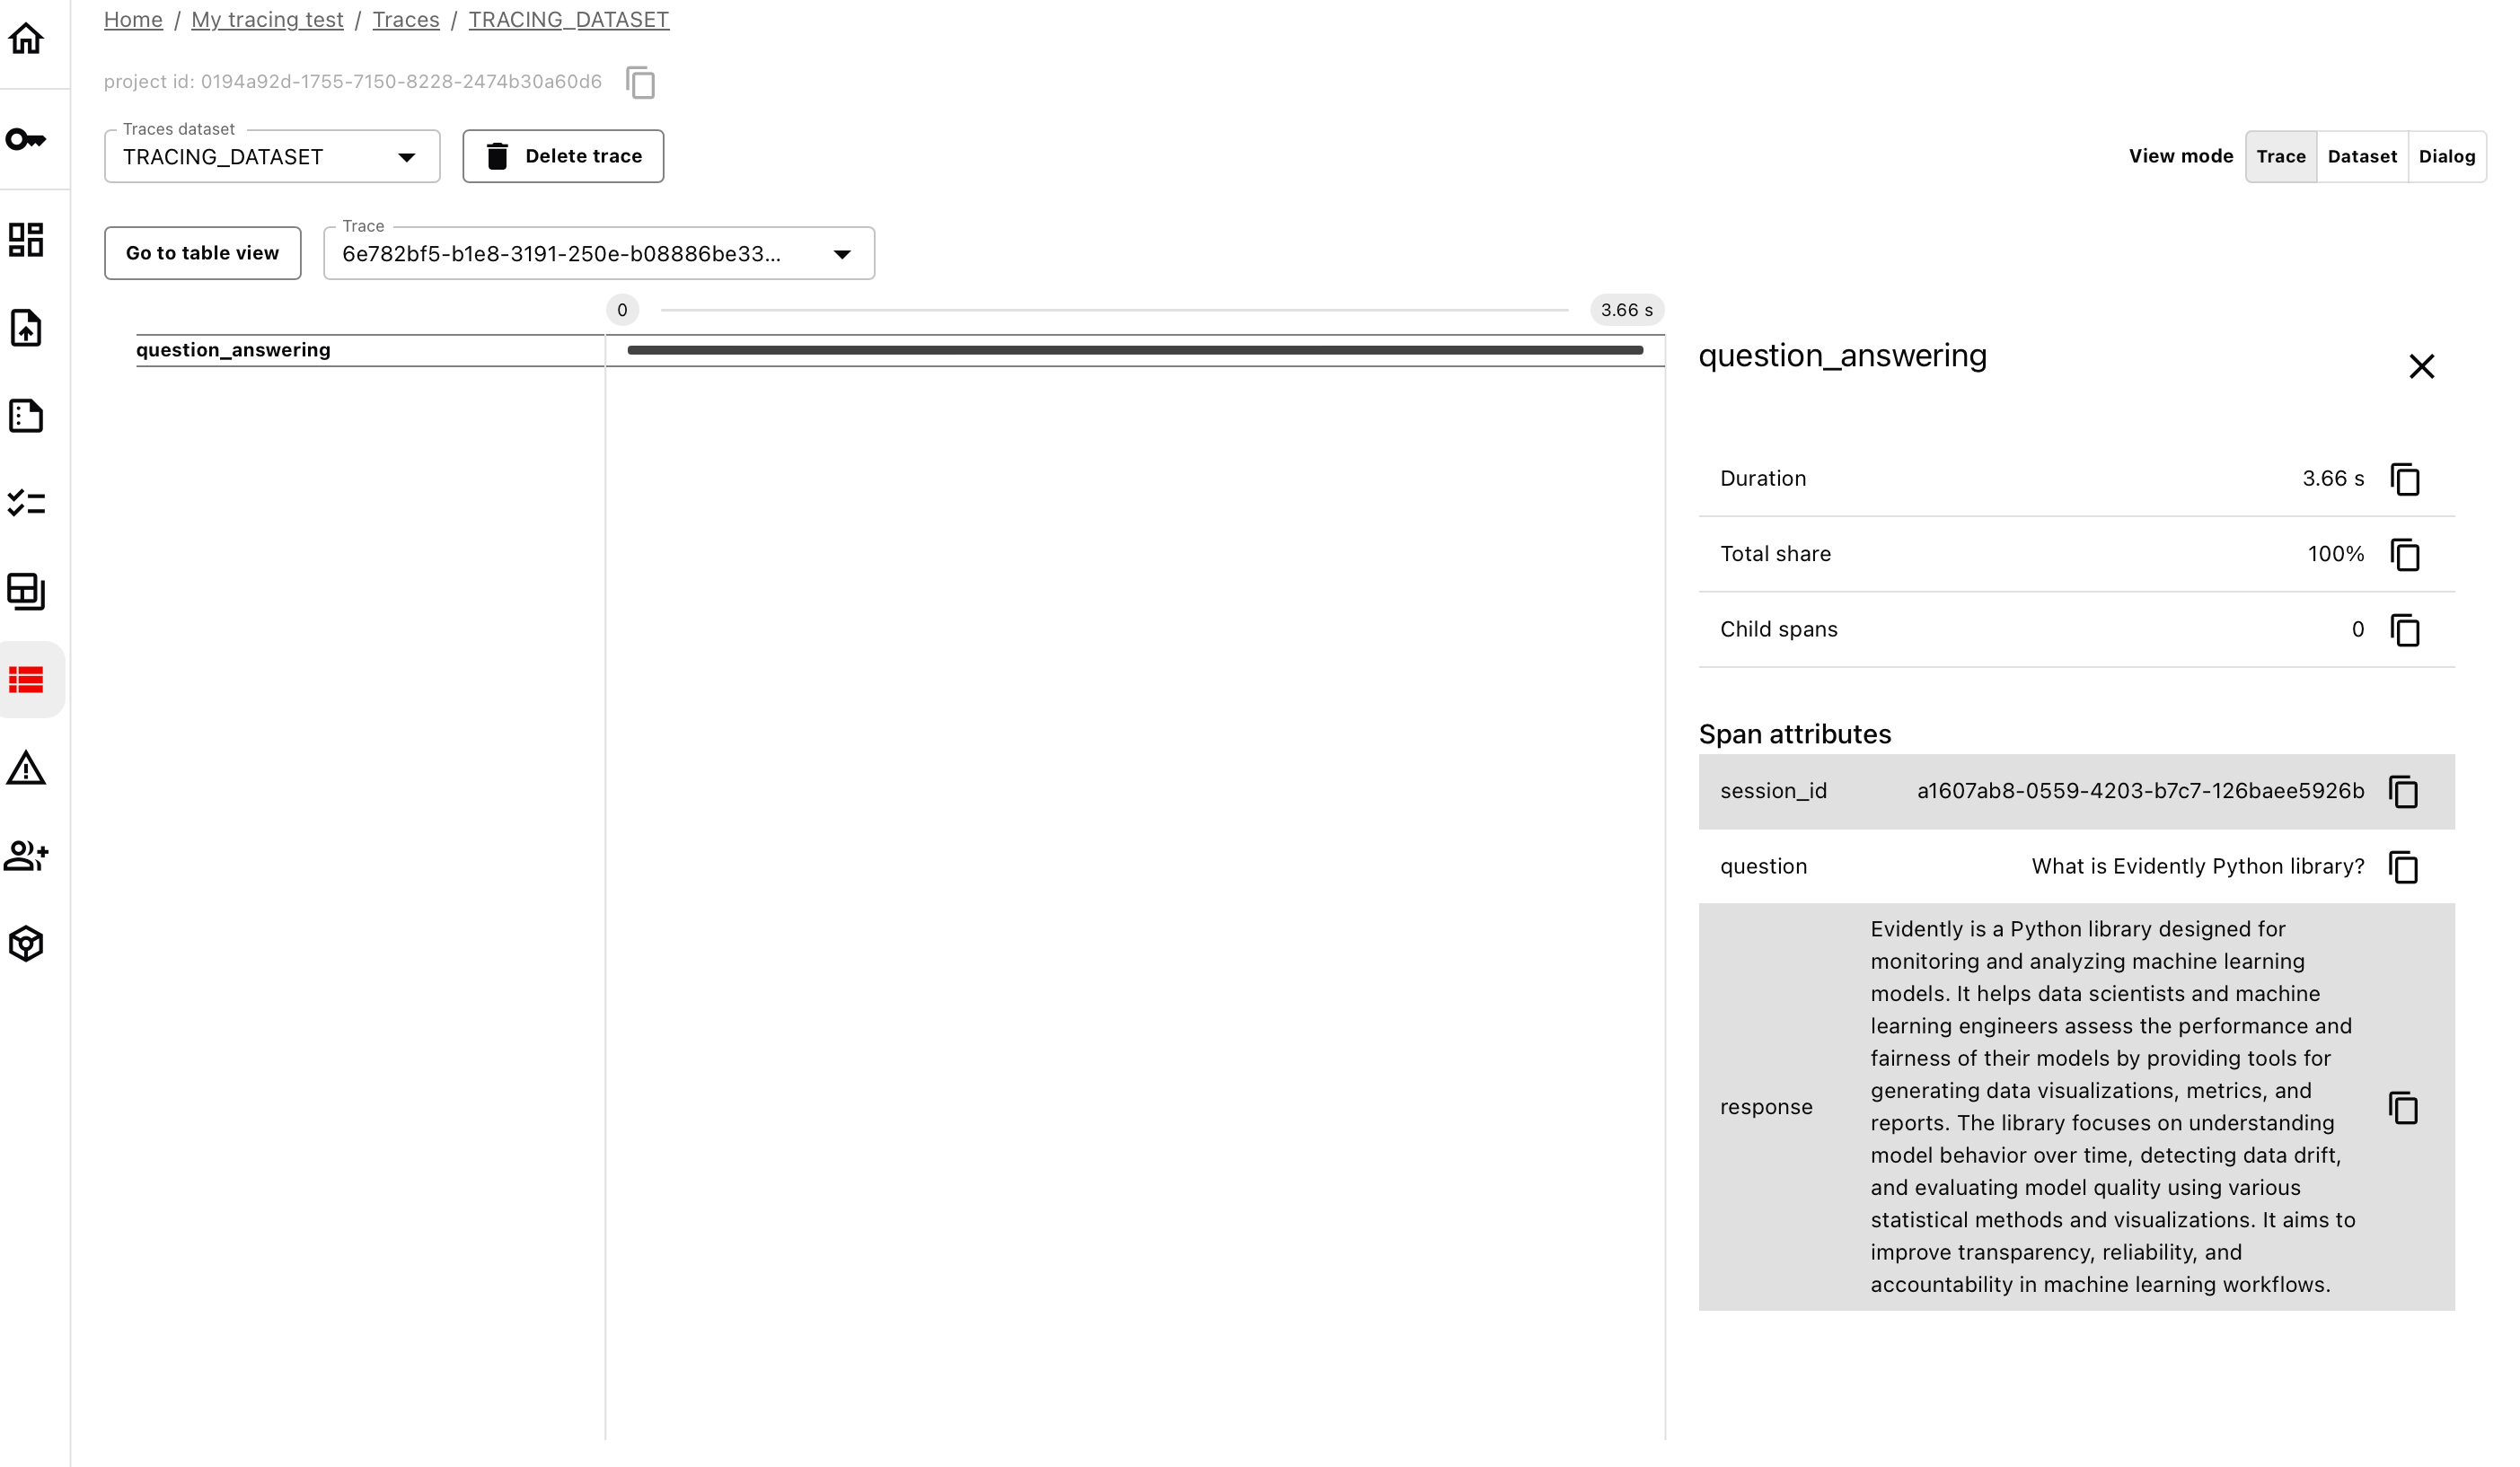
## 5. View traces
Go to the Evidently Cloud, open your Project, and navigate to the "Traces" in the left menu. Open the traces you just sent. It might take a few moments until OpenAI processes all the inputs.
You can now view, sort, export, and work with the traced dataset. You can switch between Traces, Dataset and Dialog view (select session there).
 ## 6. Run an evaluation (Optional)
You can run evaluations on this dataset both in the Cloud and locally. For local evaluations, first load the dataset to your Python environment:
```python theme={null}
traced_data = ws.load_dataset(dataset_id = "YOUR_DATASET_ID")
# to create and preview as pandas dataframe
# df = traced_data.as_dataframe()
# df.head()
```
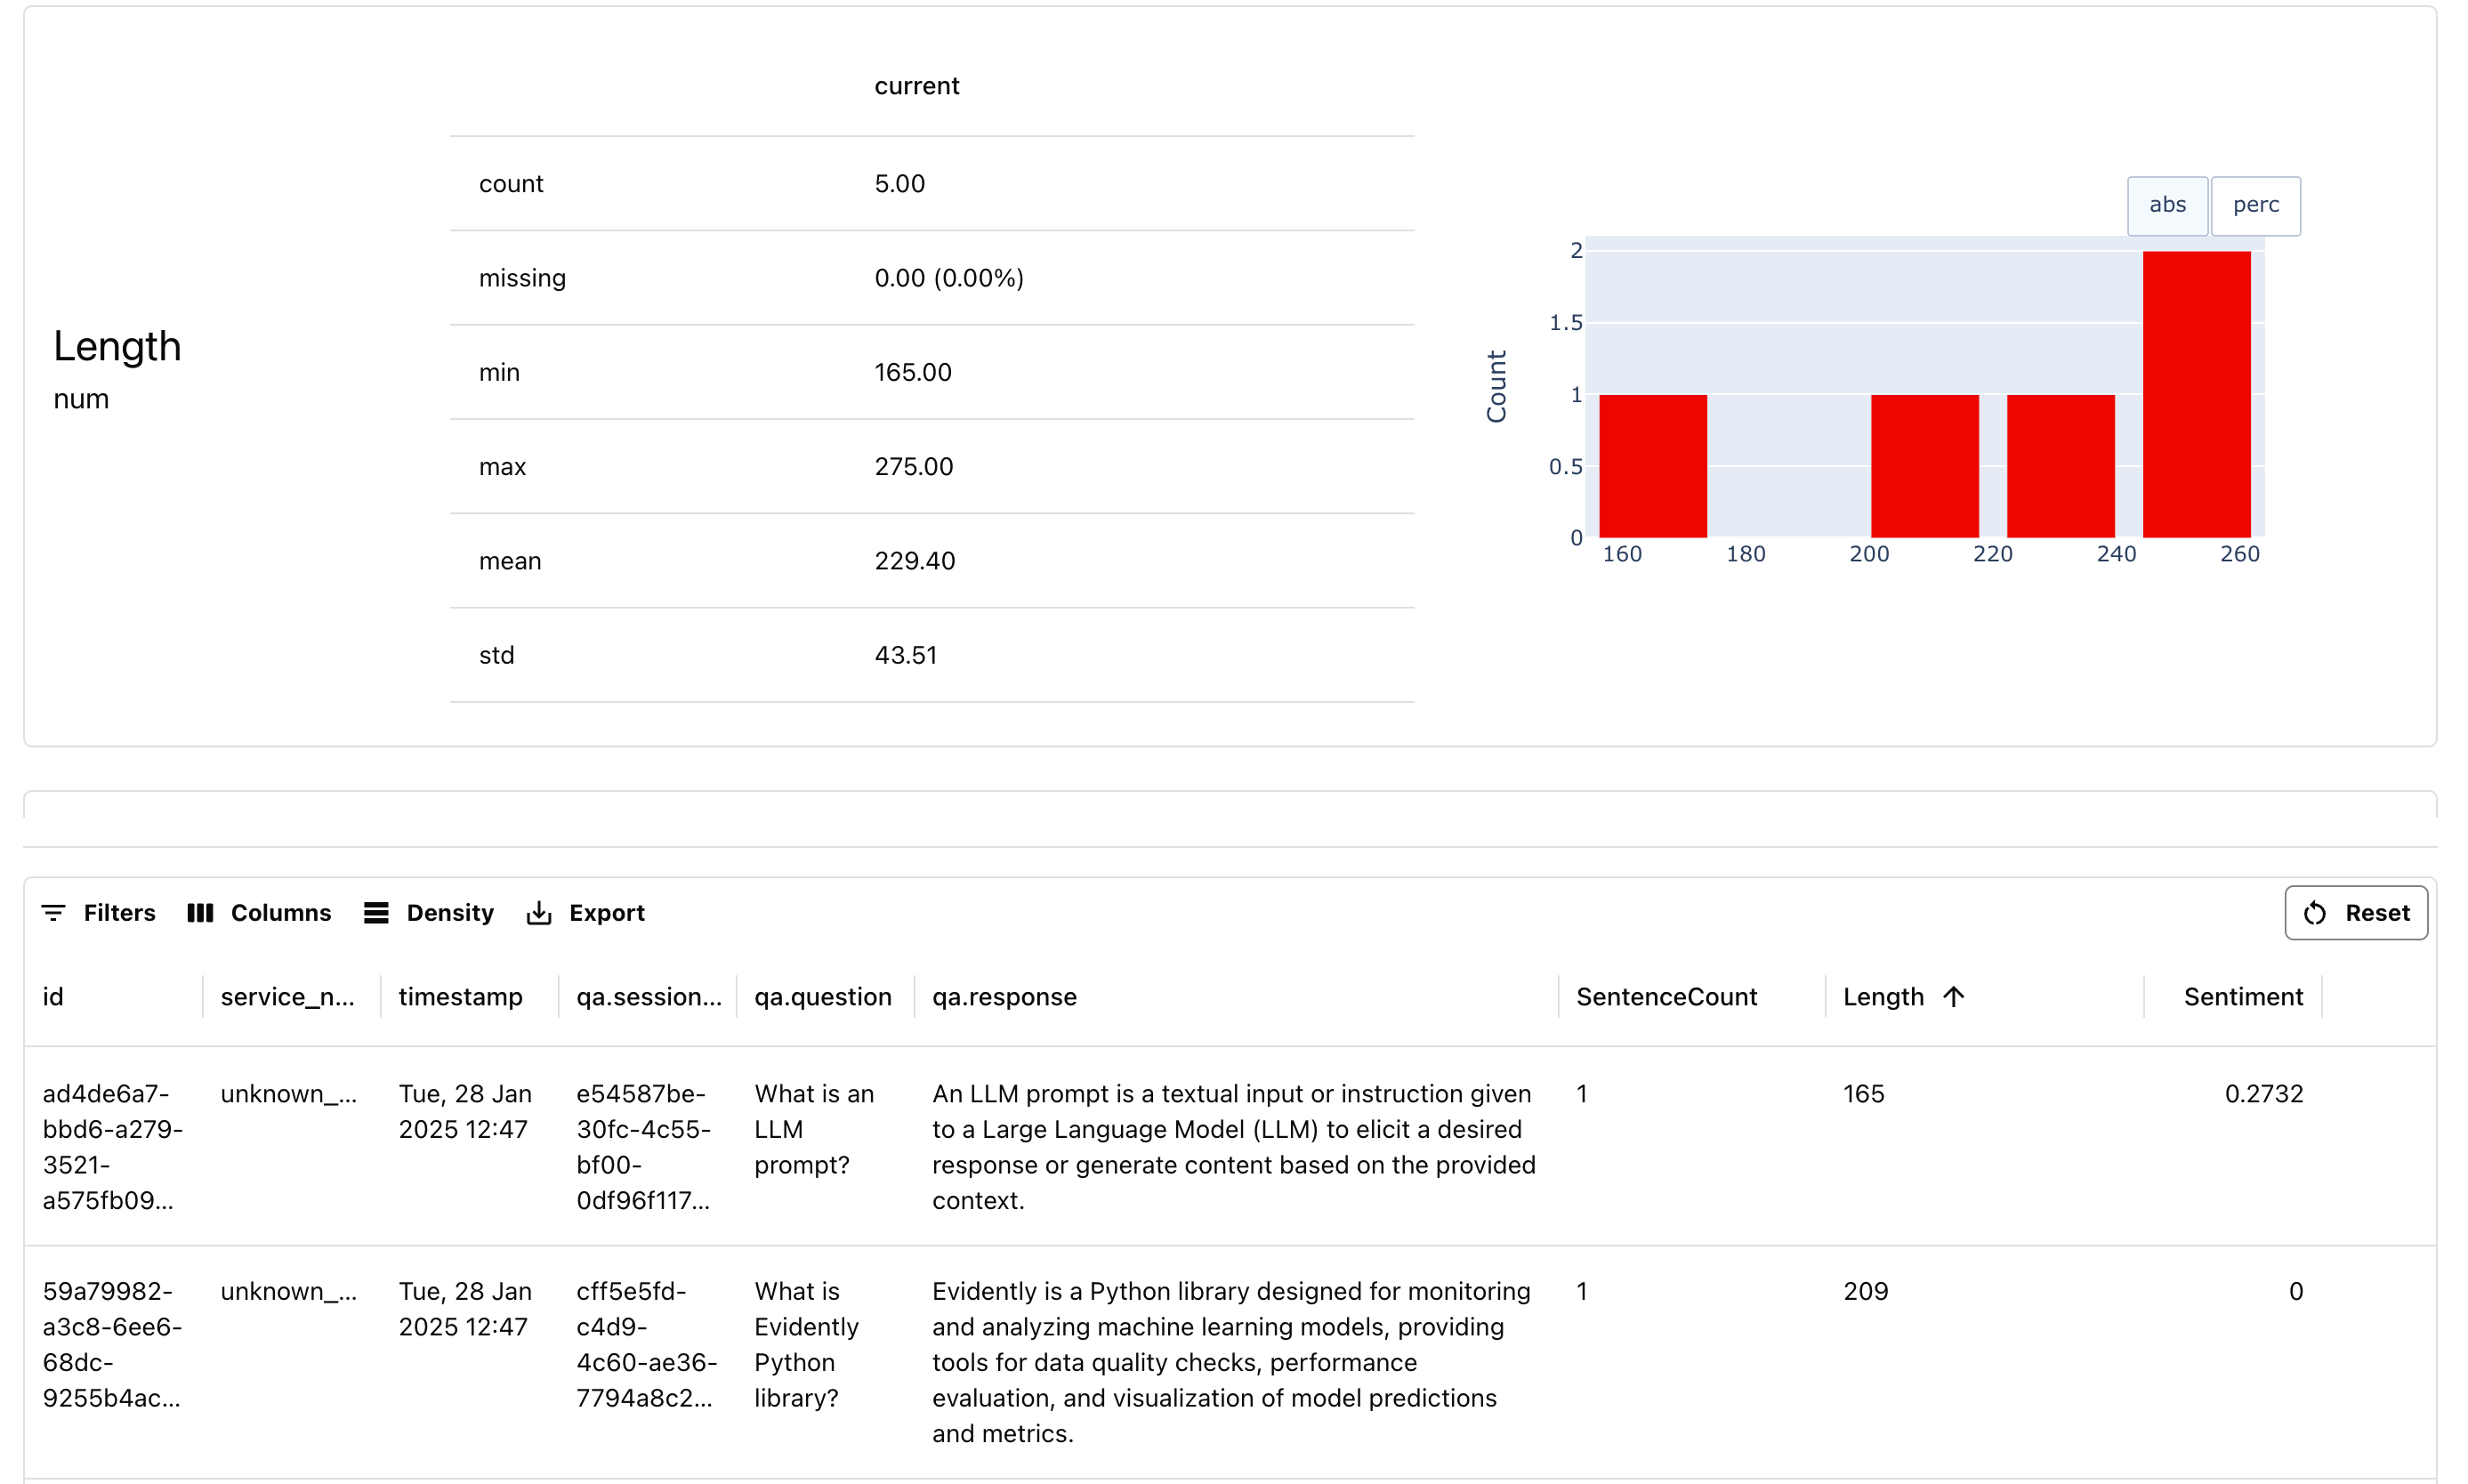
You can copy the dataset ID from the main Traces page inside your Project. The Dataset is already available as Evidently Dataset. To run evaluations, choose the descriptors to add:
```python theme={null}
traced_data.add_descriptors=[
SentenceCount("qa.response", alias="SentenceCount"),
TextLength("qa.response", alias="Length"),
Sentiment("qa.response", alias="Sentiment"),
]
```
Summarize the results using the Report, and upload to Evidently Cloud.
```python theme={null}
report = Report([
TextEvals()
])
my_eval = report.run(traced_data, None)
ws.add_run(project.id, my_eval, include_data=True)
```
You can go to your Project and open the Report:
## 6. Run an evaluation (Optional)
You can run evaluations on this dataset both in the Cloud and locally. For local evaluations, first load the dataset to your Python environment:
```python theme={null}
traced_data = ws.load_dataset(dataset_id = "YOUR_DATASET_ID")
# to create and preview as pandas dataframe
# df = traced_data.as_dataframe()
# df.head()
```
You can copy the dataset ID from the main Traces page inside your Project. The Dataset is already available as Evidently Dataset. To run evaluations, choose the descriptors to add:
```python theme={null}
traced_data.add_descriptors=[
SentenceCount("qa.response", alias="SentenceCount"),
TextLength("qa.response", alias="Length"),
Sentiment("qa.response", alias="Sentiment"),
]
```
Summarize the results using the Report, and upload to Evidently Cloud.
```python theme={null}
report = Report([
TextEvals()
])
my_eval = report.run(traced_data, None)
ws.add_run(project.id, my_eval, include_data=True)
```
You can go to your Project and open the Report:
 # What's next?
Check the quickstart on [LLM evaluations](/quickstart_llm) for more details: how to run other evaluation methods, including LLM as a judge, or test for specific conditions.
Need help? Ask in our [Discord community](https://discord.com/invite/xZjKRaNp8b).
# What's next?
Check the quickstart on [LLM evaluations](/quickstart_llm) for more details: how to run other evaluation methods, including LLM as a judge, or test for specific conditions.
Need help? Ask in our [Discord community](https://discord.com/invite/xZjKRaNp8b).